Showing posts with label gentle domesticity 2021. Show all posts

Monday, December 20, 2021

Last post until New Year...

What a year it has been. And how quickly it flew past. 

It would be easy to expand on the continuing impact of Covid in our countries and inquire how you managed, but I'd rather ask you this...

How did you grow as a woman, a wife, a mother, a sister, a grandmother, a friend and a neighbour, through these past twelve months?

What did you learn through 2021 that you did not know before? What improvements did you make in your health, home routines, relationships and habits? Did you deepen your walk with Christ?

These are questions I'm currently pondering and reflecting on, because I know I've grown in many ways from the woman I was a year ago, and mostly for the better. 

I mean, honestly, I still have a long way to go in character growth and habits, in becoming a wiser homemaker, a better friend, and a few more aspects of life - but there've been some wonderful character and skillset improvements made in 2021 that will keep me in good stead moving forward, and it's important to celebrate those achievements because they inspire me to keep growing, learning and changing as I approach the next season of life.

I'm inspired to be refined even more through the coming year so that my life will increasingly reflect the character God desires in me and how I conduct myself through the various aspects of my day to day life and relationships.


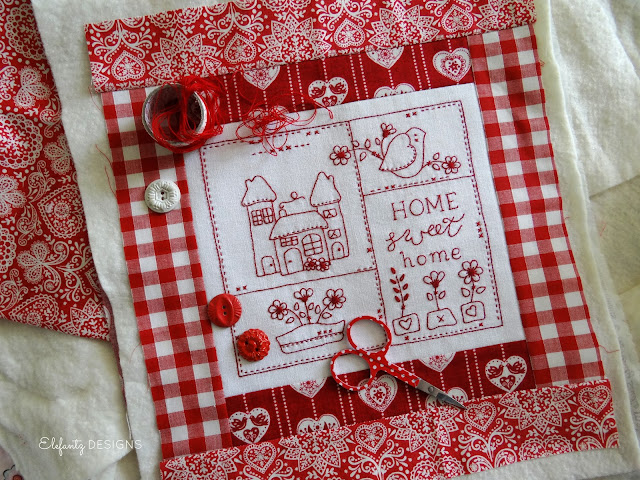
(adding the borders to my "Home Sweet Home" stitchery)

Throughout 2015 my blog theme was "A Year of Gentle Domesticity". It resonated with tens of thousands of readers and over time I came to realise that it had become for me a kind of banner over my heart, a banner which has changed now to "Living a Life of Gentle Domesticity".

More and more I'm drawn to homemaking, learning the old ways, appreciating simplicity, fighting the urge to consume more than I need, and taking unhurried time to make decisions about the things which affect my life. 


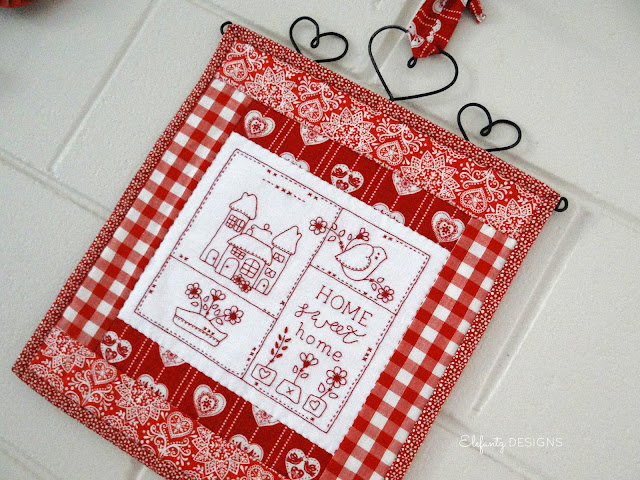
("Home Sweet Home" completed and hanging in the kitchen)

But there's one attitude which needs adjustment, and after chatting with others recently, it may be something you've struggled with too.

Contentment. 

In a world where it can be increasingly hard to look at what is right before us today and be content -

we are bombarded with advertisements for this, that and the other, which we apparently cannot be happy or complete without owning; 

we see and hear so many things which make us feel less than; 

the commitments we have taken on weigh heavy on our time, patience, finances and energy;

we long to be like 'her' and have our homes look like the photos she shares on social media;

we read of the endless accomplishments of certain home bloggers and feel like we just haven't stepped up enough;

we look and read and hear and perhaps weep that we can't get our lives together the way 'they' have...

Now add your own thoughts because my list could just keep growing.


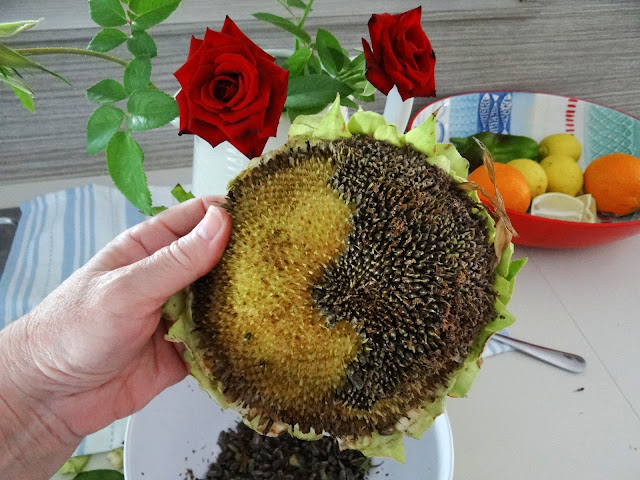
(removing sunflower seeds to dry and store for next season)

I said in my last post that there was a subject which I wanted to write about, and CONTENTMENT is that topic. It's something which has been on my mind and in my heart for at least six months, and was birthed after a conversation at my home with Rosie. 
Lamenting (hey, let's be honest here - I was complaining) the boring brown of my kitchen, the still bare concrete floor in our bedroom, the dismal colour scheme of the walls and doors, lack of storage space...I could go on but I won't. You get the point. Mostly that day I was whining about the kitchen, for it felt like a heavy burden which could never be lifted unless we ripped the whole thing out and (expensively) made it over to my 'dream' ideal. 

Rosie looked with fresh eyes, common sense, and kindness. I was glad of the kindness, so like her, even when giving me a gentle prod to be appreciative of the fact this kitchen was not very old and still had a lot of useful years in it. When we bought this home three years ago, the kitchen had only been installed two years prior to that, so yes, it's relatively new. The previous owners liked brown, beige and very plain decor, colours I would never choose.


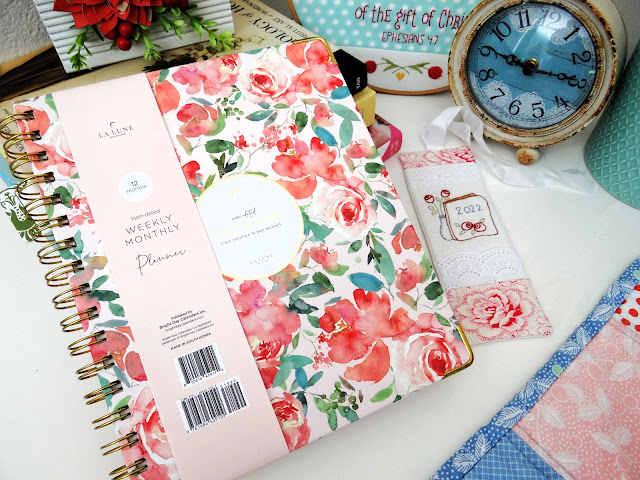
(a new planner for 2022)

We don't have the finances to pull out a very well put together kitchen just because of the colour, but my own heart could not see past the brown, as hard as I tried.
Having a good friend who speaks the truth in kindness is a gift and after she pointed out all the benefits of my kitchen a new appreciation began to grow within me. And that led me, in the ensuing months, to contemplate in just how many areas of life I felt a measure of discontent.


(reading list for the next couple of months - most already started)

So, back to the beginning of this post and my desire to grow and hone my character in the year ahead. I've chosen a new theme for the blog in 2022, one which I am aware will be challenging, but one which is needful because without it, life might occasionally feel a bit disappointing.


I hope you'll join me in the journey towards a contented life. I plan to have one Year of Contentment post each week, and scatterings of other posts around it. 

As a Christian, I am content in my choice of faith, and my decision to follow Jesus day by day. However that's a different kind of contentment, that's contentment in having made a choice and following through with no regrets (like my marriage, 30 years on December 28th).

Next year's desire to grow in contentment will be focused on all the aspects of life where I find it difficult to live with a genuine and lasting attitude of being content. 


We have very low-key and simple Christmas Day celebrations each year because for us every day is the day to glorify God and give thanks for the gift of Jesus...just as every day is the right day to consider the reason He came to us and what it cost Him. 
Blossom, Ross and the children will be here, and we've all decided a cold spread for lunch, followed by frolicking in the pool, plus some Trivial Pursuit with coffee later in the afternoon, will be the perfect day for us.

Until sometime around New Year, I shall sign off now and wish you all a very blessed, holy and joy-filled Christmas. Thanks for being here this year, you always bless me, so I pray we get to know each other even better in 2022...

hugs


Saturday, December 11, 2021

A quiet post...


May your Sabbath be restful, your heart be at peace, your hopes renewed as you ponder and give thanks for all you have been given, and may contentment fill your thoughts as you embrace the little things that bring you joy. 


Bless you,


Tuesday, November 30, 2021

Simple and free gift wrapping idea...


Have you noticed that things are becoming more expensive?
Do you think twice about your purchases these days?

About a decade ago I shared a simple tutorial for repurposing toilet roll inserts as wrappers for fat quarters, and recently it occurred to me that I could take that idea a little bit further by offering you a free gift idea.

Most of us who sew or quilt have a stash of fabric we've collected over the years, and if you're like me, some of those fabrics aren't our style anymore - or, we simply have more orphan fat quarters than we will use. So perhaps it's time to pass some along?

Now, you could do this by simply choosing a few pieces and gifting them to friends; or if you're part of a quilting group you might prefer to do a fabric swap. 

Rather than purchasing wrapping paper for your gift, consider this idea of mine. It's pretty, uses up smaller scraps of fabric, lace and ribbon, holds two fat quarters nicely, and it makes use of empty toilet roll inserts - turning something ugly into a thing of beauty.


A good idea is to choose a plain or low volume print for the insert cover if you intend filling the wrapper with patterned prints, and vice versa.

I made my first wrapper with a scrap piece of cream cotton/linen blend fabric, the same fabric I use for my embroideries. 

Cut through the toilet roll insert and open it out so you can measure the height and width.
Double the height and add 3/4".
Add 3/4" to the width.


My insert measured 5" high x 4" wide, so I cut my fabric 10.75" x 4.75"

Fold the fabric in half as shown below, and a little less than mid way up the top section, sew a piece of lace.


Cut two pieces of ribbon 10" long.
Sew them to each end of the lace edge.


Fold the ribbon ends into the centre before folding the fabric in half and pinning the sides.


Sew down both sides with a 1/4" seam.


Turn the fabric pocket right side out and press.


Place the toilet roll insert inside...


Fold over the edge to create a hem.


Ladder stitch or blind stitch the opening closed. 

Now you're ready to fold your two fat quarters into a roll and place inside the pretty wrapper.


Tie the ribbon into a bow and you have a very lovely gift for giving! 

My second wrapper was made using a print fabric, and the fat quarters were tonals.


Notice how both the wrapper fabric and the fat quarters blend together? Think of that when you're making these.

Another thing to consider when gifting fat quarters from your stash is whether the fabrics you have chosen are of a colour and style your recipient uses - after all, we don't want to give someone fabrics they won't like.

If you'd like to keep this tutorial handy, just use the link below to download it to print or save to your computer.

DOWNLOAD Gift Wrapper Tutorial

Hope you enjoy making a few of these - and if you have other ideas for what can be gifted inside these pretty wrappers leave them in the comments below. 

Have a wonderful day. I am off to visit Blossom and the children on this very wet and muddy day here in the tropics, so you know my day is already promising good things...

hugs


Friday, November 26, 2021

Simple delicious recipes made on rainy days...

 The wet season has arrived and the garden is happy once more. My roses are abundant, and the vases inside overflow with their soft beauty, filling the air with a gentle romantic fragrance.


Having heaven water the plants each day has freed up an hour or so every morning, time which is normally spent watering and generally tending to the regular needs of a tropical garden preparing to welcome another ferocious summer.

A few days this week that precious hour has been added to time spent in the kitchen, and I thought I'd share some of the tasty things which were made - plus some of the recipes. 

We had two pumpkins left from our winter planting and it's important to use them now, before the moist humidity rots them (which is what happened to a few pumpkins last year). We don't have anywhere cool and dry here to store produce at this time of year so I decided to work through a few recipes which could be enjoyed right now and also frozen for later.


Whilst cutting out recipes, household hints and articles from my very old Notebook magazines earlier this year, in order to discard what was not needed and thereby freeing up one whole shelf of a bookcase, I found this recipe for Roasted Pumpkin and Apple soup. 

I always roast the pumpkin for my soups because it intensifies the flavour, but had never heard of adding apple as well...


I chose to cut up the smaller pumpkin for this soup as I could use it all at once. My fridge held a few granny smith apples which needed to be used and I also had a half carton of cream and some chicken stock, both leftover from a mushroom pasta sauce on Monday night. It's important to me these days that I make use of what's already in the fridge before shopping for more fresh produce or cold items, so this recipe ticked a lot of boxes! It also called for fresh sage which we have abundantly in the garden at the moment.


Firstly I fried the sage leaves for a minute in olive oil until crisp and set them aside for later, then chopped the pumpkin, apples, onions and garlic (my pumpkin pieces weighed 900g, a bit less than the recipe called for)...


...before placing them in the baking dish and coating them with the oil I'd fried the sage in. A sprinkle of salt and pepper, then in to the oven for 40 minutes (I tweaked the instructions to suit my own preference).


Once baked, I poured three cups of chicken stock over the mix and let everything go cold. 

Then into the blender and once smooth I poured in the cream. This was so simple, and really delicious with the crushed fried sage and fresh chives scattered over the top. I'd call this recipe a keeper. 


The other day I also worked on using leftovers from the fridge, this time for dessert. My beloved really enjoys his dessert and thankfully is easily pleased with simple sweets. He especially likes it when I bake fruit in puff pastry, which is what I did with a punnet of raspberries, a half-empty tub of cream cheese and the small bit of raspberry jam left in the bottom of a jar. 


I buy sheets of frozen puff pastry to have on hand for these kind of desserts or for pies, but you could also roll out a block of puff pastry if that's all you have.

The photos below are of the second batch I made because after photographing the first batch (above) it occurred to me you might like to see the steps. This lot were a mix of raspberries and strawberries, and though they turned out just as lovely, I did find that strawberries have a lot more liquid than raspberries so there was leakage...next time I'll stick with just raspberries (or blackberries, or apricots...so many other options!).

Mix together half a cup of cream cheese, 1.5 tablespoons of icing sugar (confectioners sugar), and 1 teaspoon of pure vanilla extract. This is enough for eight pastries.

Cut the sheets of puff pastry into four squares each and place a small amount of the cream cheese mix in the centre. Add 1 level teaspoon of jam, and then place the berries over the top.

I can fit four on a tray...


Fold two corners into the centre...


Fold the opposite two corners into the centre as well, pulling the pastry a little longer as you do that. This helps to stick the four corners together.


Pinch the open corner edges together to seal the pastry closed.

Beat an egg, and lightly brush some egg over each pastry - you only need a little. Sprinkle granulated sugar across the top (I use raw sugar, but any granulated sugar is fine)...


Bake at 200c (400f) for around 12-14 minutes. They will puff up and go golden brown when ready. Truly, these are simple and really yum!


Thursday morning I was due to visit Blossom so I baked a batch of buttermilk scones. On Wednesday night I'd made buttermilk chicken with coleslaw and avocado on the side, and still had half a carton of buttermilk left, so once again I chose to use up what was already at hand and half an hour later these were baked and ready to wrap in a large tea towel for travelling...


I shared a photo of the scones on Instagram, with a lovely quote from Laura Ingalls Wilder, and when my friend Fee saw it she was inspired to bake scones too. 

Later in the afternoon we were chatting on the phone (we live at opposite ends of Australia) discussing our shared ideals about homemaking, baking, getting older, and how we both need to slow down more in our businesses next year in order to immerse ourselves deeper into that beautiful occupation we love so much - gentle domesticity. We also talked about meals, the simpler ones our Nanas made, and why we both want to emulate their culinary resourcefulness now and into the future. 

Well while we were chatting, Fee mentioned that she had a partially used can of crushed pineapple in the fridge and that she could use that to make a pineapple fruit cake. No sooner had she thought of this than I could hear her rattling around in her kitchen gathering ingredients. Funny thing was, I also needed to bake a cake because I had a few glass jars about 1/4 filled with various dried fruits that needed to be used soon. In our humidity even dried fruit goes funny if left too long. 

So, I gathered my own recipe for pineapple fruit cake and soon we were texting photos to each other as we mixed, poured and baked 'together' over the phone. I tell you, this was so much fun!! And at the end we both had a delicious cake. I froze half this morning and the remaining half will serve hubby and I with a cuppa for the next few days. 


If you'd like my recipe for no-fail Pineapple Fruit Cake, it's in this FREE issue of The Homemaker Heart magazine

Today I decided to bake a loaf of Honey & Sultana bread for toasting at the weekend. I overbaked it slightly because I did not hear the timer go off, but it's not too bad and still tasted wonderful when I sliced the end and buttered it. I adore crusty bread, but hubby prefers the soft centre. 


Here's the recipe if you want to try it. I make my dough in the breadmaker, then remove it and fold into a loaf shape for my bread tin. Once it has doubled in size I bake it at 200c (400f) for around 23-25 minutes. Of course I went five minutes longer this time, hence the overbaking. 


The final tasty treat I'll show you is the Spanakopita which I baked on Tuesday night. We had a lot of parsley in the garden which needed to be cut back, and a large bag of spinach leaves in the fridge to be used, so I knew baking Spanakopita would not only bless us, but bless my Cypriot son in law Ross. 

I took the leftovers to him and Blossom yesterday and he messaged last night to say it was delicious and he was so grateful. Normally I bake him Cypriot/Greek meals on his birthday and at Christmas, so this was a surprise which he really appreciated. 


Now, finally, last week I showed you the Savoury Scrolls I had made and received comments and emails asking me for the recipe. 

You only need a basic bread recipe (go HERE to download three I shared a few years back) and make it to the point of it's first rise.

Once the dough has risen for the first time, roll it out into a rectangle shape. Spread with tomato pesto, and grated cheese. You could also add olives, shredded chicken, salami, chopped red onion - anything you like, but don't overfill the dough. 

Roll up the way you would make a swiss roll, then cut into twelve pieces. Lay in a large greased or parchment lined baking dish, and scatter more cheese across the top. Bake for around 20-25 minutes at 200c (400f) until risen and golden brown.


So tell me, what are some recipes you make to use up leftovers from the fridge or pantry? Do you plan your weekly menu with that in mind?

I've had this ideal for a (very) long time, but too often allowed busyness to get in the way and more food than was necessary found it's way into the compost or rubbish bin due to expiring before I made use of it. 

With the increasing scarcity of many grocery items these days, and the higher cost of everyday items and fresh produce, I'm determined to use what I have on hand before buying more...and also to consider Nana's example and think more simply with regards to meals. Another thing which is becoming increasingly clear, is that we are not eating as much as we used to and I need to reduce the servings, cook smaller portions, or freeze half the meal for another night. My friend Rosie and I have discussed this a number of times lately, in fact it was she who mentioned it first and made me start thinking about the size of the meals I prepare. 

We are living in changing times and new challenges seem to be cropping up around every corner, but if we take notice, and adjust our homemaker habits accordingly, we can get through this. 

Next week I have an idea for gift giving which won't cost you a penny. In fact I have a few simple ideas which are inexpensive, but the first one uses what you more than likely have on hand already. 

God bless your dear hearts, and thanks for dropping by, for being an ear to hear and also a source of wisdom for myself and others when you share your own ideas and life lessons.

Hugs