Showing posts with label Creative Hands at Home. Show all posts

Friday, May 8, 2020

Thoughts and ideas (project seven)...


Do you have a mind that is constantly dreaming up ideas but more often than not forget them by the next day?

This is not a new problem for me, in fact way back in 2011 I got so frustrated by all the thoughts and ideas that floated in and out of my mind during the day and even through the night that I made a very simple but well loved journal cover and matching bookmark to keep them fresh and remembered.


I used scraps of my favourite (at the time) Tanya Whelan fabric and some pink RicRac braid for the cover and the same fabric for the bookmark but with the addition of a pretty tassel.

That was nine years ago and recently it was time to begin a new "Thoughts & Ideas" journal so all I had to do was remove the old one from the cover and insert a fresh one. 


I'm a list maker, a note taker, a quote keeper, a Scripture ponderer, a planner and an ideas scribbler so that's what ended up inside the old journal and will fill the pages of a new one.

The free 'mental space' I have at home now has given me more project plans than ever - stitchery designs, garden layouts, recipe tweaks, bible study topics, house redecorating, health makeovers...and so much more. So if this is happening to me, maybe you've also found your mind bubbling over with random and interesting thoughts and ideas as well?


Why not raid your favourite fabric scraps and make a journal cover and bookmark for keeping track of all those things you'd like to do, learn, study, make, bake, plant and sew?

Use the link below to download my free pattern!


This is the seventh free project I've shared in Creative Hands At Home over the past eighteen days to fulfil my desire to help you be creative in your homes during this time of enforced home isolation - and I really do hope that some of them inspired you, not specifically to make the patterns you've seen here on the blog but to look at what you have on hand and think creatively about how to use those fabrics or notions to brighten your home environment.


It's Mothers Day in Australia on Sunday so I want to wish all of you lovely mums out there a very blessed and joyous day.
Sweet Blossom and her little ones came by this morning and we celebrated Mothers Day a little early with gorgeous flowers, coffee, cake, a favourite movie to watch with Rafaella and Cully May, a good play outside with the chickens and much fun tramping around Poppy's garden.

The girls arrived all rugged up because it's a novelty here to wear fleecy jackets, but they soon had them off and were running around outside in t-shirts. But they look so cute, don't they!


I'm pleased to say next week will see a return to my regular Homemakers Heart posts, so until then, God bless you so very much!

Loving hugs


Wednesday, May 6, 2020

Project six creative hands at home, and slower days...


In keeping with my love of all things birdlike today's free home-based project features a feathered friend, with or without wing, appliqued onto a very simple pot holder you can sew using what you have at home.

Being able to create from what we already have in our sewing supplies is good for the soul, saves money, and in this series of Creative Hands At Home it also adds to or replenishes items we use in our dwelling place.


I made these potholders last year but never shared the pattern on the blog until today. There's a season for everything and this season is definitely about adding simple beauty in and around our homes, especially the kitchen for me as it's where I spend a lot of time.

One of the potholders was padded out with a double layer of cotton quilt wadding, whilst the other potholder has Insul-Bright heat resistand batting. Use what you have or what you prefer. 
I bought a 1/4 metre of Insul-Bright and could probably make a dozen pot holders so it worked out every inexpensive. But I also like the softness of the double cotton wadding layer.


You can download the free pattern using the link below...


You can use the basic pattern to make the pastel potholder with winger bird, or use the bird applique shape anyway it pleases you. 


SOME IDEAS for using the applique bird on a project other than the potholder: 

* adding the applique bird to the centre of a quilt block would be really nice and a good way to use up one or more orphan quilt blocks in your stash. These could become pot holders, cushion covers or if you sew a few of them pretty soon a nice lap quilt might be made!

* applique a bird or two onto tea towels or apron pockets

* sew the bird into each corner of a pre-bought tablecloth or make the tablecloth from a square of gingham. (I might do this!)

* make a basic tote bag and applique the bird onto the front, or maybe go the extra mile and add a bird-embellished pocket to the front of the bag?

Do you have other ideas to share with fellow readers of my blog? Write them in the comments because I'm also looking for new ideas to use up what I have in useful ways.


We had two unseasonably cool late autumn mornings over the weekend and it was so nice to slip into fluffy slippers, even though it was still warm enough for cotton pyjama pants and a t-shirt.

I took the opportunity to make soup on Saturday before the cool air left us once more (the weather is back to very warm again which is just sad when you long for a cold break after the endless summer) and put my 'handmaidens' to work in the kitchen.

The slow cooker and the breadmaker sat side by side while I made cookies for Mr E...


He loves these ones as they are full of oats, sultanas, walnuts, orange zest and rosemary - quite an unusual ingredient that rosemary, but really adds something special to the cookies. I'm actually munching on one two while I type this blog post...using restraint not to go for a third.


I baked a loaf of sun-dried tomato bread, a first for me, and WOW, it was so darn good that after indulging on many slices with the soup that night we had thick slices as sandwiches the next day too!


I make my dough in the breadmaker but then remove it and place in a proper bread tin for the second rise and to bake in the oven. I shall indeed make this recipe again, and again.

The soup was a new recipe and though it was nice I felt it needed more 'body' so I added a few more spices about half way through, and a cup of macaroni half hour before serving. Again, yum.


It was the May Day public holiday on Monday so hubby was home from school - yay!
After doing a little gardening I left him outside to finish the heavy stuff (as this wife does)
and went inside to move around some of the furniture in the living room. 

I swapped around the 3-seater recliner couch for our very comfortable old blue one and brought out the single leather recliner from storage in the corner of my husband's office because Mr E genuinely loves that chair.


A bonus is the corner between the couch and the dining table has now become the cosiest book nook and I look forward to being reacquainted with my library of craft books and old country living magazines in the cooler months to come.
It also gives easier book access to Cully May and Rafaella because I have a collection of children's books on a bottom shelf ...perhaps I need a couple of small kiddie bean bags?


Our long weekend was slow and rambling, just the way we like it. Things were achieved, but all in a gentle way with no time limits or expectations...we watched some wonderful sermons, listened to good music, ate delicious food, worked in the garden and around our home, and basically just enjoyed our days together. As it should be. How blessed we are.

Well dear lovelies, I can hear the chooks going off in the back yard which means one of them laid an egg and they will carry on until I come retrieve it, expecting a little reward in return which is usually a cup of corn kernels, the seedy middle of a melon, withered greens or some leftover rice, all of which they LOVE.

I pray your day is a happy one, that your hours bring productive peace and offer rest if you have need, and that you remember the Lord and all His mercies which are new today and everyday - for He loves you so very much.


On Friday I'll have the final project in this season of Creative Hands At Home so I hope you drop by for it and also say hello.

loving hugs


Wednesday, April 29, 2020

Project 5 - the tea towel apron and a few sewing tips...

My friends know that I really do love a pretty tea towel and by now I think you know that too?
Last year a good friend sent me this particularly lovely Morgan & Finch apron and I washed it in the New Year, intending to use it in the kitchen, but it was just too pretty and I knew if I waited long enough a better idea for it's use would cross my path.
Which it did the other day.

I was flipping through a favourite retro cooking book looking for an old recipe when I remembered the tea towel apron featured inside. As you can see below it's just cutting elongated triangles from each corner to make the top of the apron and then ribbons are sewn in place for the neck and back ties. 


Not a fan of ribbon ties with aprons (because I really use my aprons and have been known to wear them into a state of complete disrepair) I chose some many-years-old complimenting fabric from my stash for sturdier ties.


As with most things I find in books certain liberties were taken to alter the basic structure to suit my own size and requirements...and along the way I thought it might be good to share a few sewing tips that make my everyday attempts much easier.
TIP ONE:

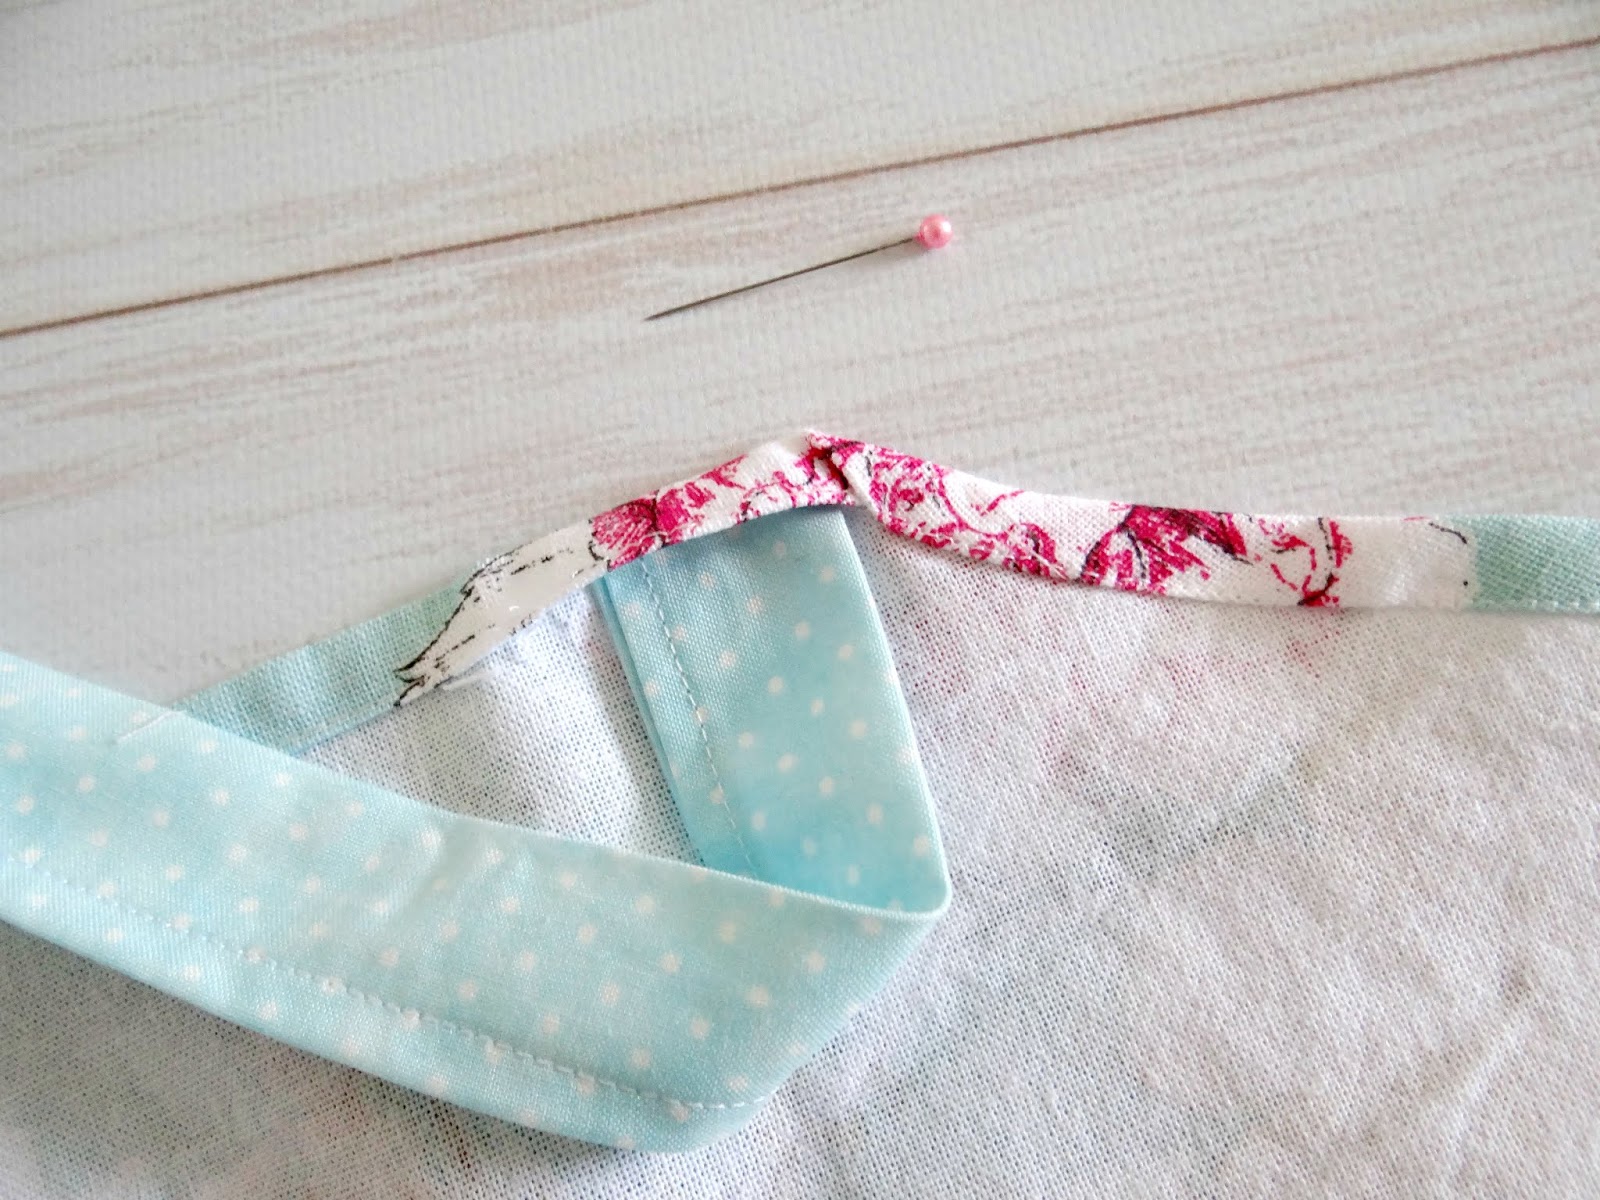
...is to WASH THE TEA TOWEL FIRST because it will shrink. In fact I've never had a tea towel not shrink and I've never had one that was perfectly rectangle. After washing this one earlier in the year it was simply folded and put away (hence the crinkles) but when I ironed it before making the apron it was obvious that I needed to trim the bottom edge as one side was an inch longer than the other. So, do check this before you continue on.

I measured the towel up against my body and made a pencil mark on one side for where the top and bottom of that elongated triangle needed to be cut away and promptly folded the tea towel in half before using the rotary cutter to remove it from both sides. You can see below that I also needed to make a new hem, which wasn't a problem as I'm a little over 5'1" tall and losing an inch from the tea towel made it a much nicer length for me at the end.


I cut two lengths of fabric 3" wide x WOF (that's width of fabric from selvedge to selvedge, usually around 42") for the waist ties and one length of fabric 2" x WOF for the neck. 


The Waist Ties...

Fold the individual fabric 3" x WOF lengths in half along their length, right sides facing, and sew a 1/4 inch seam down the entire long edge and across one end, leaving the other end open. (see the next tip before you do this)

TIP TWO:

Curve the sewing line at the narrow end so you can have a lovely rounded shape to finish all your ties. Cut away the excess fabric.


To make the neck ties follow the same steps with the 2" x WOF length of fabric but this time curve both narrow ends, enclosing them - then cut the tie into two equal lengths.

Now you have four ties.


TIP THREE:

At most hardware stores, or in your husband's shed, you can buy lengths of plastic piping and narrow ones are perfect for turning out long ties like these.
A nice long, thick knitting needle is also required, or perhaps a chopstick. I bought a set of lovely rounded end wooden knitting needles at an op shop about a decade ago for just this purpose.

The knitting needle or chopstick must be narrower than the plastic piping.


Drop the plastic pipe into the open end of the waist tie...


...right to the enclosed bottom.


Holding the pipe so that it stays at the enclosed end, gently push the end of the knitting needle into the enclosed end of the tie and push it right down inside the plastic pipe.


As you push the knitting needle down into the fabric, the tie will begin to ruffle until the needle emerges from the other end hidden inside the enclosed end of the tie...


At this stage you can remove the knitting needle as the plastic tubing is still inside the tie.
Gently pull the open end of the tie down until the complete waist tie is right side out.
Remove the piping.


Repeat the steps to make two waist ties and two neck ties.


Press the ties flat and sew a 1/4" seam along the curved side of them.


Finish the raw edge cut away side seams of the apron with a double 1/4 inch hem.

To attach the waist ties...

Unpick a small section of the side hem just below the cut away hemmed side seams.
Insert the open end of the waist tie.


Fold the tie up and over the hem before re-sewing the hem and sewing a second seam along the outside edge. 


Follow the same steps with the neck ties...(noticed I'd forgotten to sew that seam along the neck tie so I did that later)...


...and to finish you want to topstitch across the top of the neck edge hem. 


I simply added a doubled 1/2 inch hem along the bottom of my apron and it was complete.


I considered adding a pocket but as this apron will be my new favourite baking apron I won't need one. 


And of course, I had to wear it straight away, right?!
(excuse my bathroom mirror...it's not bathroom cleaning day until Thursday)


I often get asked "Where do you find such pretty aprons" and though I do pick up many checks and stripes and plains at Spotlight or the supermarket every so often, my favourite place to shop for pretty ones is Bed, Bath & Table because at the end of each season they have sets of exceptional quality Morgan & Finch tea towels at very reduced prices. I often grab a set of three for $9 and use them for gifts or in my own kitchen. The friend who sent me the one used in this apron must also love Morgan & Finch!


NEED MORE CREATIVE  IDEAS?

If you're after some other ideas to make while we're all staying at home here's a couple that may interest you.

Alicia Paulson has kindly offered her Maggie Rabbit pattern HERE for free at the moment. Blossom made one of her dolls for me at Christmas and assures me they are beautiful to make.


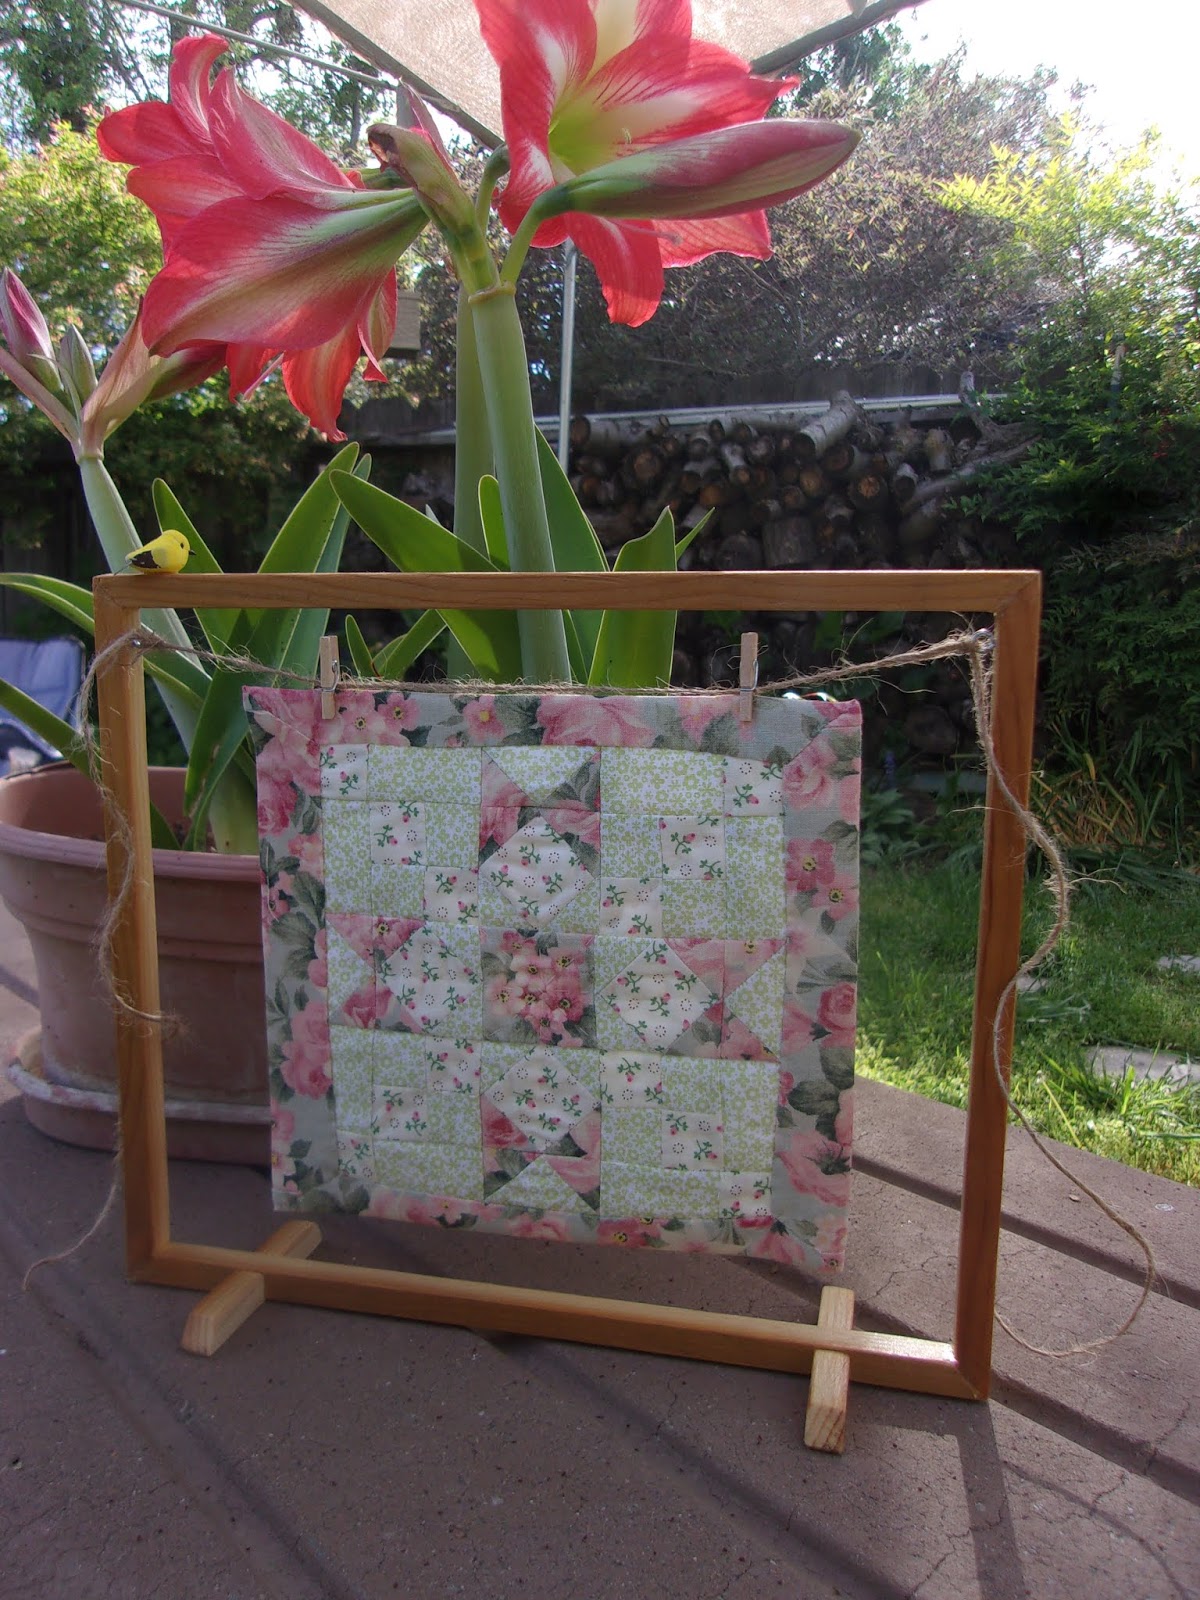
And this is my REJOICE stitchery pattern (available HERE) which has taken on the most beautiful display by Kathy who asked her husband to removed the glass from a photo frame and add a little hanging swag and standing feet.
She finished Rejoice as a mini quilt and the back is gorgeous too!
Isn't that a clever idea for displaying a small quilt or stitchery? Kathy found the idea on Pinterest - and unlike so many things I see there, she followed through and made it her own. 
Thanks for sharing Kathy!


Well that was a long tutorial today so I won't share photos of what else is happening at home, even though I'd love to. 

But because I'm missing those gentle homemaker posts which I usually share each week I'm going to postpone the final two Creative Hands At Home projects until next week on Tuesday and Thursday (May 5th and 7th) and do a homely catch-up post here on Friday. Can't wait to show you what my husband has made me with repurposed wood for the garden!

I wrote out this beautiful Psalm in my journal this morning and though it would be a wonderful blessing to share with you before I sign off today...

May the Lord answer you in the day of trouble!
    May the name of the God of Jacob protect you!
May he send you help from the sanctuary
    and give you support from Zion!
May he remember all your offerings
    and regard with favor your burnt sacrifices! Selah
May he grant you your heart's desire
    and fulfill all your plans!
May we shout for joy over your salvation,
    and in the name of our God set up our banners!
May the Lord fulfill all your petitions!
Now I know that the Lord saves his anointed;
    he will answer him from his holy heaven
    with the saving might of his right hand.
Some trust in chariots and some in horses,
    but we trust in the name of the Lord our God.

Loving hugs