
When I stitched "Friendship Heart" for the Stitchery Club it was with the intention of tea dying it afterwards, but I didn't want to show you until I'd made sure the colours in the hand dyed threads hadn't run.
I've had problems with hand dyed threads running in the past - variegated red threads in particular, so I had some trepidation in soaking this lovely embroidered vintage napkin in tea.
However, it was successful, so I breathed a sigh of relief and can now share this simple technique that you may like to try yourself!
Tea dying gives a lovely effect when you want an aged or vintage look to your embroideries, fabrics or laces. I've used it on all three and have never been disappointed.
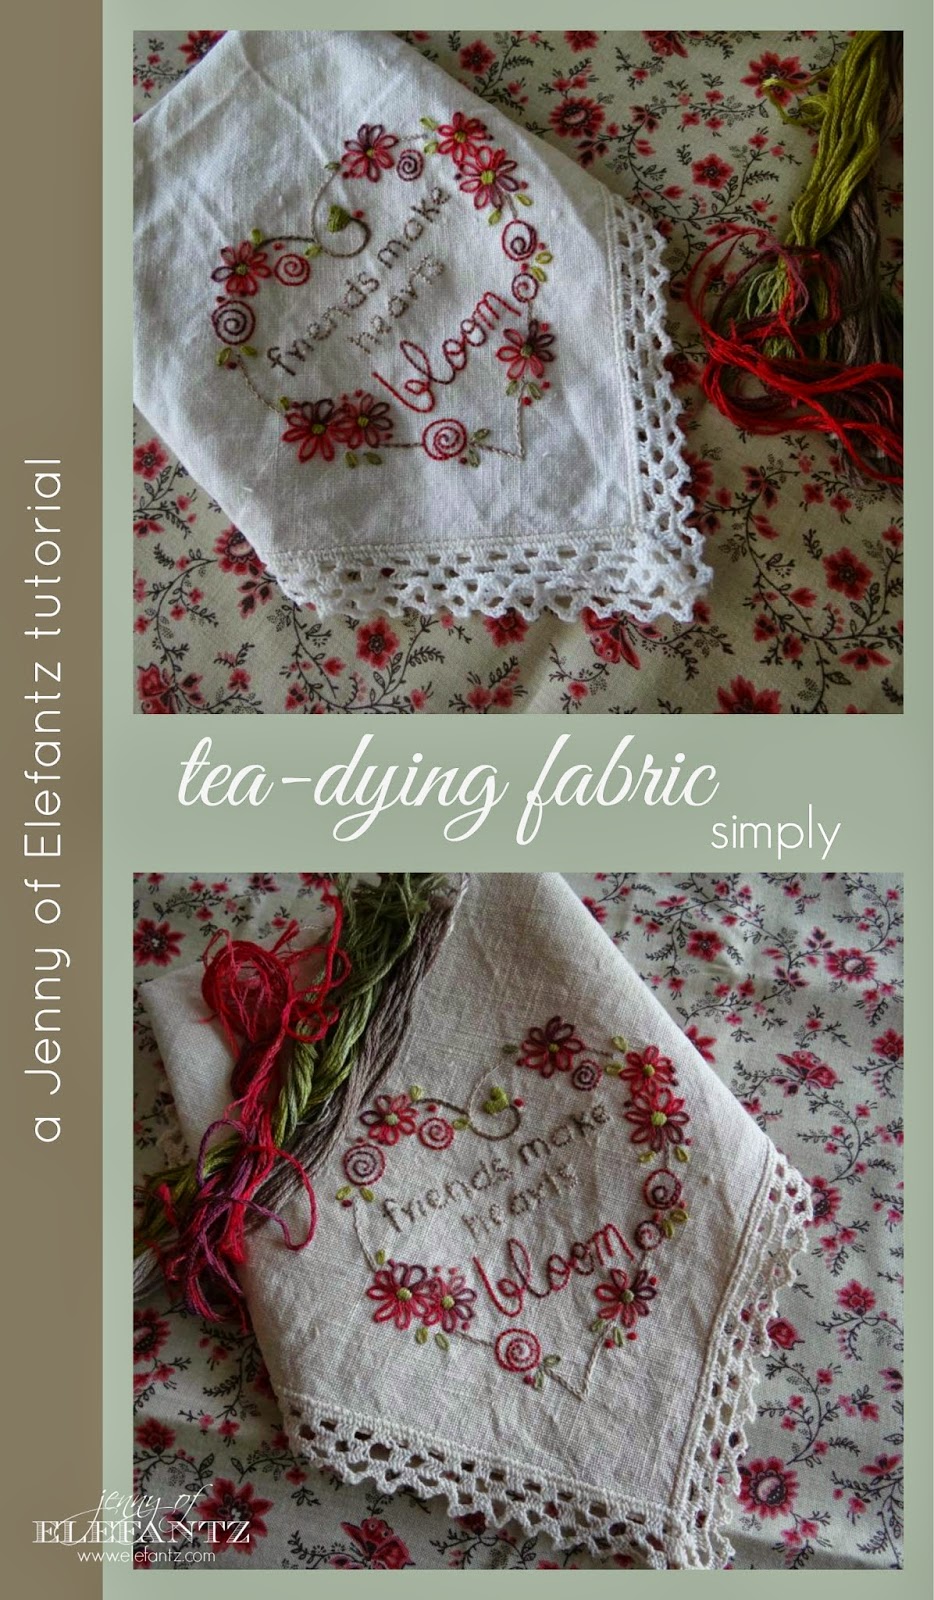
Here's my original design, stitched on a very light cream linen napkin...

The fabric in the background of the photo is Rural Jardin by French General (2010).
I wanted to tea dye the linen in hope it would blend more readily with the light brown of the floral fabric.
It's always an experiment to do this, but it's fun!
As I was just dying a 12" napkin I needed only 3 tea bags...

Remove the tags from the tea bags and boil your kettle!

I let my tea bags steep in two cups of boiling water for about 30 minutes, then I removed the tea bags after giving them a good squeeze above the water to release as much of the tea dye as I could.
Dispose of your tea bags and soak your fabric in the mix.
Every hour or so give the mix a stir with your finger...

It's up to you how long you leave your fabric or stitchery in the tea, but don't get concerned if it goes really dark and remove it too soon.
Once we rinse the fabric after dying, much of the tea will wash away. It also lightens when it dries, so sit back and let the tea do it's thing.
I kept mine in the tea for about 3 or 4 hours.

When you remove the fabric from the tea, rinse it thoroughly in cold water and squeeze the fabric gently to express the rinsing liquid. You could also fold it in a hand towel and roll it up to remove the water. Here's mine after rinsing by hand...

I was so excited the threads hadn't run!
When you tea-dye, the colours in the thread change too, but only subtly. It's that change which adds a lovely blending between the fabric and thread, and that's why I tea dye after I embroider and not before.
Let the fabric dry naturally. It's quite warm here in the tropics so mine dried easily in a couple of hours hanging over the bathroom towel rack.
A quick press with the iron and my 'aged' linen is ready for use in a larger project!
See how it has lightened after drying?

And yet that gentle addition of the tea dye has given me the result I was after and the linen now blends beautifully with the French General fabric...

Just so you can see the difference here is the original napkin on the left, and the napkin after the tea dye on the right...

A subtle change, but now it's perfect to compliment the floral fabric!
Next week I'm going to tea dye some old doilies which are soiled with rust marks as it may add a more subdued aged finish. I'll be sure to show you when they're done.
hugs

10 comments:
I love it! We actually sell fabric at the store I work at that says, "tea-dyed muslin" on it.
I love the effect of tea dying... & you were very brave to risk it.
Love it! Thinking I must find better finds in the op shops we hang out in! ha!
That is very subtle Jenny; I didn't realise how differently it would dry - I'll leave mine to steep a while longer from now on.Thank you for sharing x
Thanks for the tutorial Jenny. I must admit I panic a little with how much time I should leave the fabric in the tea. That's interesting to know you leave yours for 3-4 hours. I love giving fabric that older look.
This reminds me of the time I tea dyed the lace for my wedding dress :) I couldn't find the exact shade I wanted so with great trepidition decided to try tea dying it....it worked out fabulously!
Me encantan tus trabajos , tienen esa timidez extraordinaria que se necesita y a la vez brillantes, gracias por este tuto.Un abrazo desde Leon , España.
Obviously, the key is to be bold!! Great tutorial - thanks for giving us the confidence to leave that fabric soaking for hours longer then we think it needs to!!!
Gorgeous piece, Jenny, and I'm sure it will make a wonderful addition to your collection of finished pieces. Tea dying is fun.
The tea staining just adds that little extra something doesn't it? Love your embroidery darling, exquisite as always xxx :-)
Post a Comment