
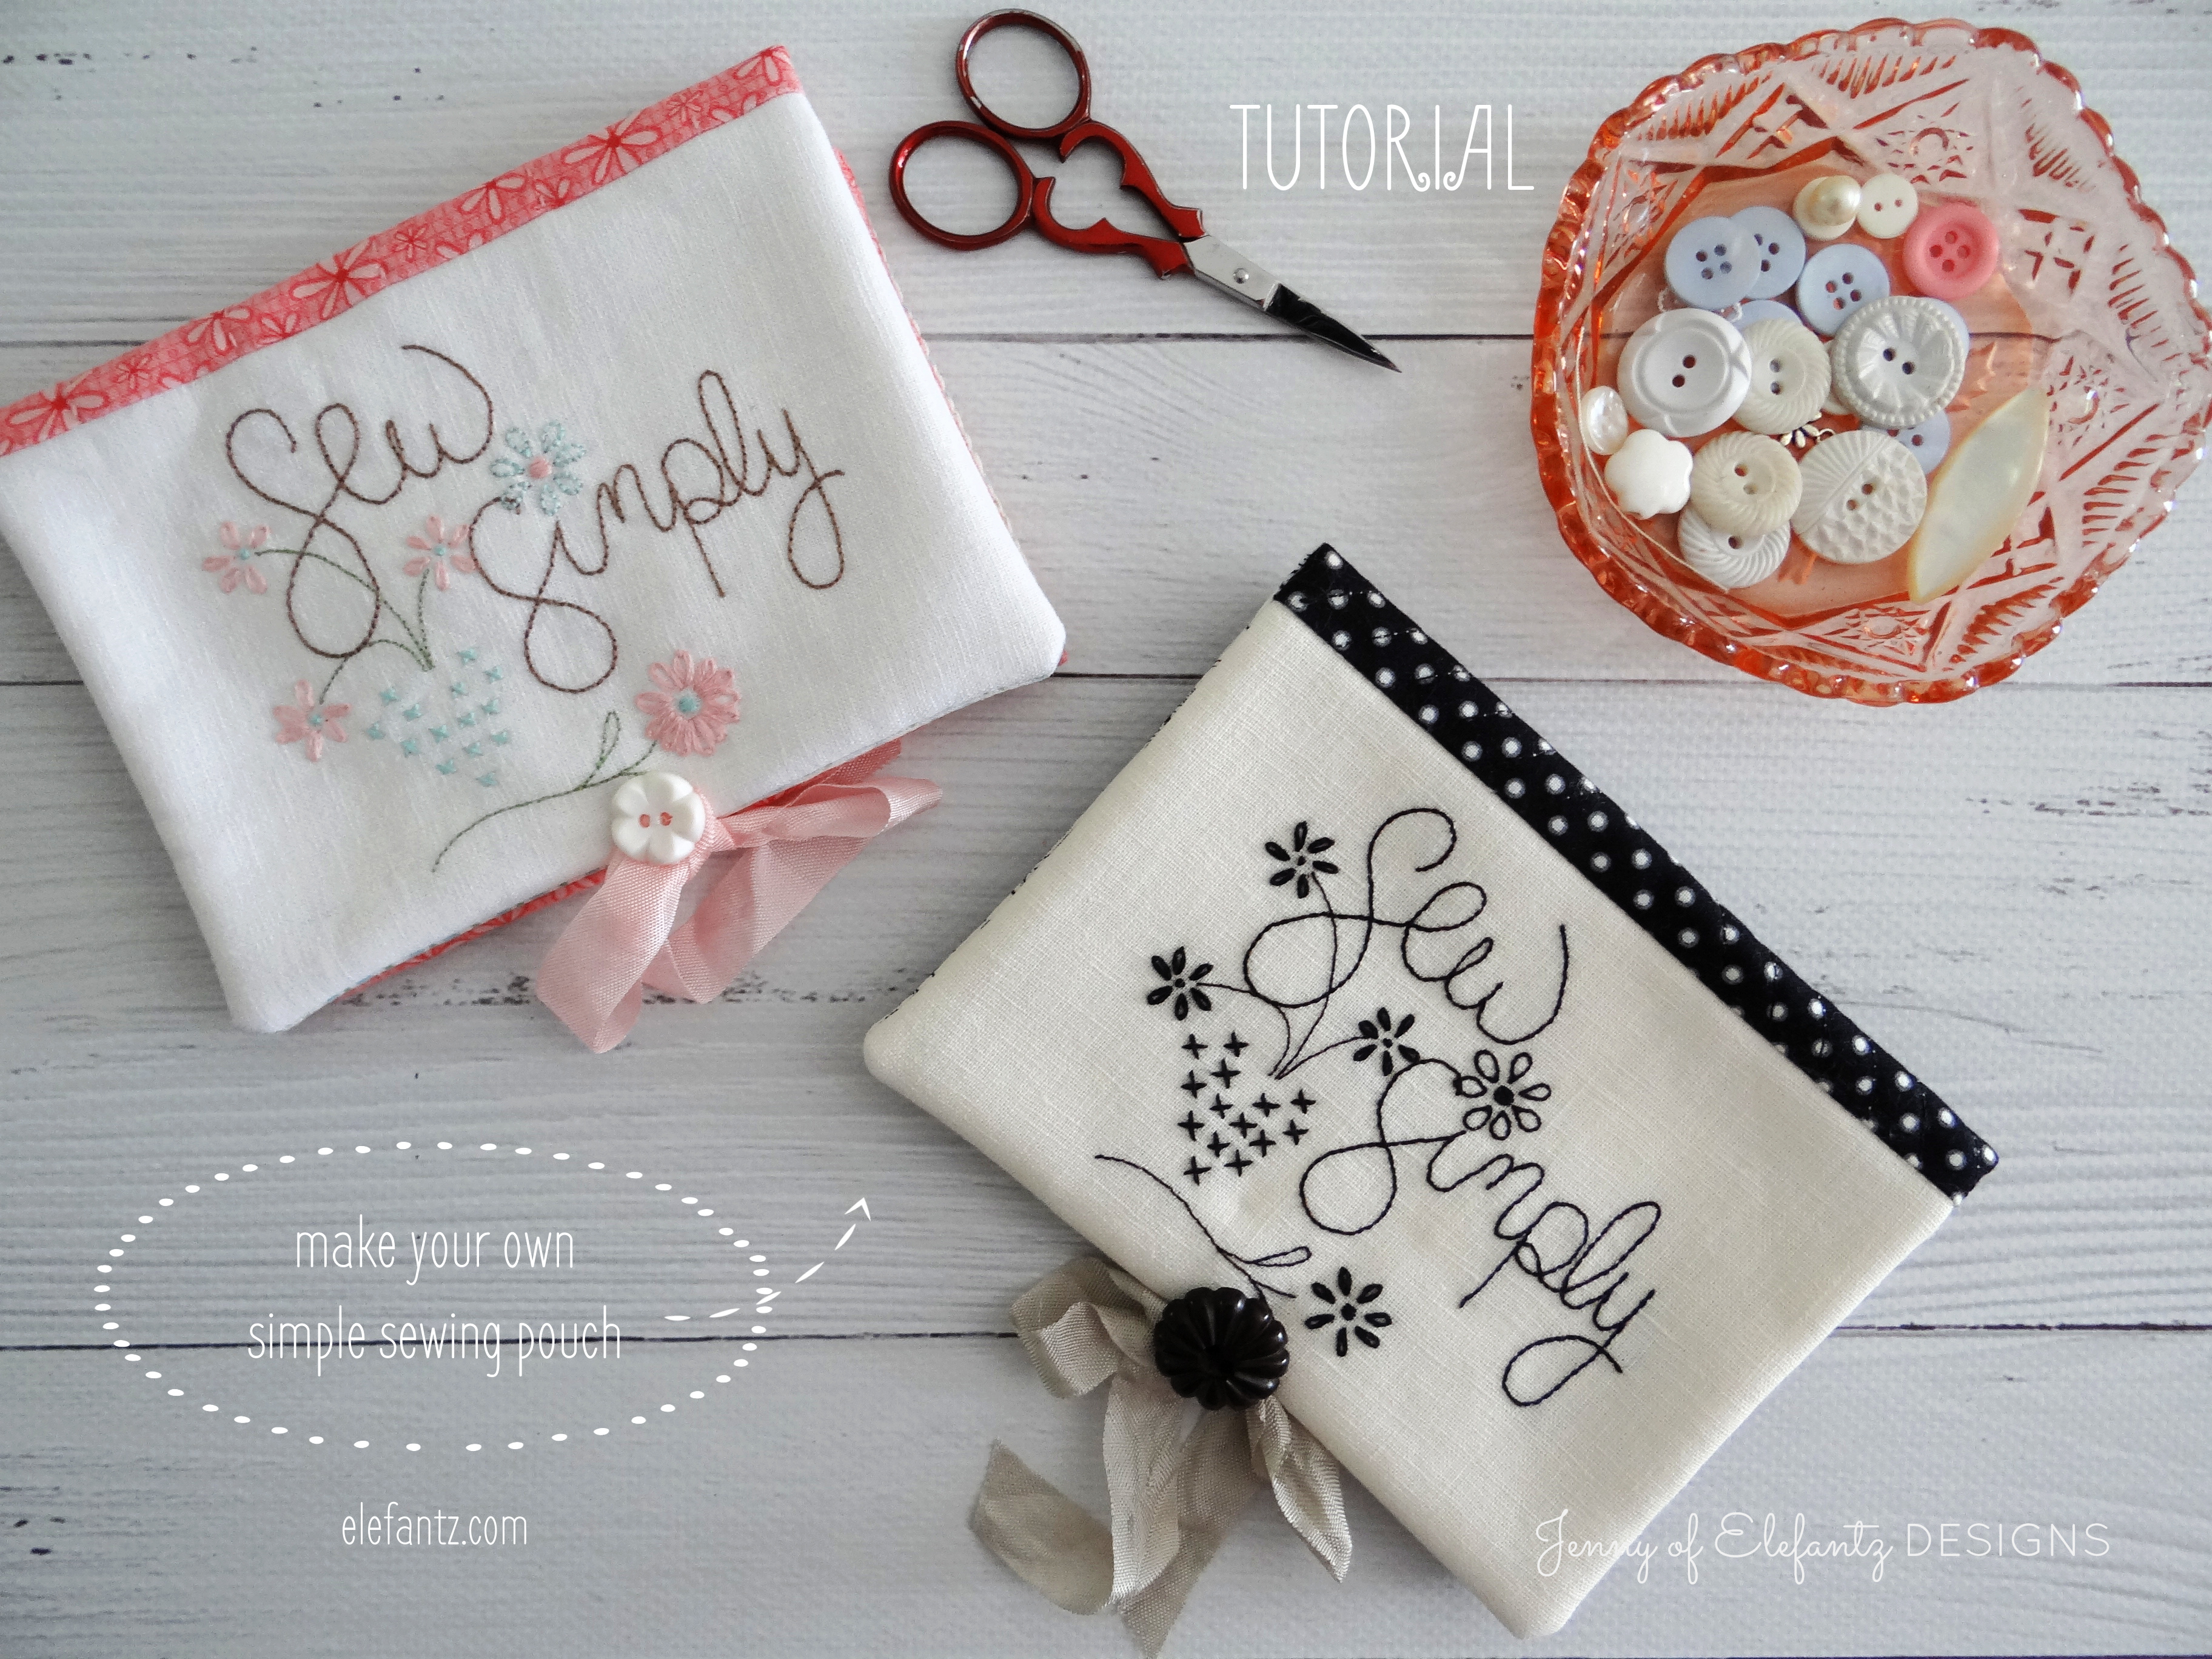
A couple of weeks ago I made a cute little sewing pouch from my blackwork version of the Sew Simply stitchery. Well, I loved it so much that I made another, this time a pastel version...and I loved it too!
Perhaps you'd like to make one of these pouches yourself? They are perfect for posting away in swaps or to friends, and especially good for using up smaller pieces of fabric and leftover pieces of quilt wadding. I am always thinking up ways to use leftovers from sewing projects.
Firstly, let me say that you can use any stitchery you like on the front, as long as you can trim it to 4.5" x 6.5" - or you can purchase my Sew Simply pattern (which includes this tutorial) HERE in my Etsy Shop
Let's begin with what you'll need...
One stitchery trimmed to 4.5" high x 6.5" wide
One piece of black/cream spot fabric 6.5" x 9.5"
One piece of lining fabric 6.5" x 13.5"
One piece of cotton quilt wadding (or similar) 7" x 14"
One piece of doctors flannel (or felt) 2.25" x 3"
One length of ribbon measuring 1/2" x 16"
One 3/4" button
Now we'll make the sewing pouch...
Use a 1/4" seam when sewing.
To make the cover, sew the trimmed stitchery block to one narrow end of the black/cream spot fabric. Press the seams away from the stitchery. Place the completed front onto your quilt wadding and either machine or hand quilt in your preferred style. I chose to only quilt the black fabric, leaving the stitchery block untouched.
Then trim away the excess wadding.

Lay the lining face down on the right side of the quilted cover, pin together, and sew around all sides leaving a 3" opening along the narrow black end.

Turn right side out, gently pushing out the four corners with a rounded tool (I like to use a large wooden knitting needle, but a chopstick would be a good choice too). Press with an iron.

Ladder stitch the opening closed.
Fold the bottom of the cover up by 4.5" to create a pocket, and pin.

Sew the sides together using a slip stitch to secure the pocket.

Using two strands of embroidery thread the same colour as the doctors flannel, backstitch the flannel in position where shown near the top inside of the sewing pouch, BUT...be careful not to sew through to the front. Let your stitches catch in the wadding only.

Find the middle of your ribbon, and sew to the centre bottom of the sewing pouch, along the fold line.

Sew your button to the centre bottom of the Sew Simply stitchery.

Add some pins and needles...

Wrap the ribbon around the button to close the sewing pouch. You're done!


Which sewing pouch is your favourite? The black or the pastel?
I have always been a pastel, shabby chic, occasionally vintage, type of gal...but I really love the black one.
I have made a couple more of these pouches, with different stitcheries, but I'll show them in another post because I might be going to sell them in my shop next month...maybe.
Bless you heaps, dear ones. May the Lord of all good things be right beside you today, speaking words of life into your spirit, and shining the Light of Christ if you find yourself in darkness.
Till next time,

Don't miss out on any Elefantz news or free patterns.

16 comments:
This is a really sweet project, thank you
Hi Jenny, thanks for sharing this cute project. Must say I like both of the pouches even though I am not a huge fan of using only black and white in my projects. Stay blessed!
Hi Jennifer,
Looks like a fun project :)
The colour combinations are endless !
Success with filling your Etsy shelves :)
hugs, take care,
Joanne
Simple and very useful Jennifer - great idea. xx
What a lovely project! If you sew, you have scraps, great project to use them. Thank you for all your inspirational give us!
This is a great project to use up all your small scraps! Thank you!
Absolutely love this, Jennifer! I so need to get back into stitching and this might be the very project to get that going. The black and white is my favorite of the two, but they are both lovely ♥️ (Jenn Nilsson from jennifernilssonart on IG)
Dearest Jennifer,
So good to see your lovely post and project. Thank you for sharing the tutorial with us . Super cute and useable project . I have been busy powdering dehydrated egg shells for the garden. To use to help my soil with the calcium from the shells . And as of today I have started dehydrating banana peels as well to use in the garden as free fertilizer for the potassium they have . Have a Blessed day/night .
What a sweet project. Perfect for gifting.
Those are absolutely scrumptious - pick a fave? Not possible, lol! I agree, much nicer to have something to keep your hands busy in down time rather than a phone....
They may become one of my One Gift a Month projects. I do like it and it seems easy to do, the way you explained it. Plenty of stitcheries to choose from in my collections from you! I think I like the black one better, but any colors would look great. Thank you so much for sharing this project. It really makes my heart happy.
Beautiful really beautiful!! I love the black one!! Love Mary-Lou
I loooove the black and white one and I am surprised you made it in these colours. So cute and practical too. I still haven't been receiving emails for your posts for quite a while now so I apologise for not keeping up.
Both sewing pouches are lovely however I love the black and white with the Paris fabric. Great gift idea. Thank you dear. This could also be adapted for post cards, stamps and a pen with elastic to hold it.
Thanks again, Jennifer, for another lovely tutorial. I like both and can envision them in many combinations.
As an aside to Ondrea, try checking your spam or junk folder. I too was missing most of Jennifer's post and that is where I found them. I don't know why Google suddenly decided to put them in the junk folder. This happened to several other blogs I subscribed to as well.
Very cute. However may I suggest that the pink and blue font are hard to read for older eyes. And in North America a rug is like carpet, it is on the floor. Aw, the changes we made from being away from part of the British Empire. Words do not always flow across the oceans. Cute little tutorial, Thanks!
Post a Comment