Showing posts with label The Stitchery Club 2016. Show all posts

Saturday, January 14, 2017

The week that was...

It's been a lovely week at home.
Every day the rain arrives, sometimes a lot, sometimes a few short showers. The pitter-patter of raindrops on the roof, dark skies and heavy clouds, inspired me to bake an old favourite for Mr E - Shepherds Pie. Rain and comfort food go together, right?
Rather than spread mashed potato across the top of the lamb and vegetables in rich gravy I decided to veer from tradition and layer scalloped potato slices instead. It was delicious...


Blossom's washing machine died so we've had the blessing of extra visits from her and Cully May while washing is done from my laundry. 
Isn't she adorable!? Five months old, sitting up all by herself and enjoying her first Milk Arrowroot biscuit (Poppy/Mr E's favourite!)...


I've managed to get ahead of myself with new designs for February...


...and caught up with my best friend Rosie Heather on Wednesday for morning tea and stitching.
In the past I've always referred to her as Heather on my blog, but now I can call her by her full name, Rosie Heather and if you read her blog post from New Year she'll explain why. 

Rosie's stitching the Sampler from January's issue of The Stitchery Club and here's a peek at her progress...


One of the perks of being my best friend is that she gets to play with my new designs before anyone else, but the perk for me is that I get to eat her delicious baking at our morning teas when I take the patterns over. Obviously I get the better end of the trade because she does all the work in the kitchen and I just sit back and gobble it up! 
This visit she made yummy blueberry muffins but I forgot to take a photo. Too busy eating? 


Here's my original Sampler for the January 17th issue of The Stitchery Club plus the extra project/tutorial included this month.


This sweet little needle-book is cute as can be, and the wonderful thing about it is that all six of the smaller stitcheries on the Sampler can be used on the front, so you could make six completely different versions...


New members have until midnight of the 16th to join in time to receive this issue.


Another stitchery project I've had some time to work on is a repeat border for the centre stitchery of a simple quilt I intend finishing this month...


Those four border stitcheries will surround the  bird block as the centre medallion of the quilt...


...and from there I will add simple fabric squares in green and pink prints, plus four more stitcheries 
probably positioned in the corners of the layout before a final border is sewn on.


These six stitcheries were in the December 2016 issue of The Stitchery Club so once I've made the quilt there'll be a free pattern shared here for those who want to use them the way I am.

The countdown is on for Mr E to return to teaching on the 19th, so every day he's been working on our Jeep to fix an engine oil leak, replace all the air conditioning parts, and repair the turbo...and in the midst of our first real wet season in years. 
The humidity and temperature here in the tropics this summer is very high and dreadfully uncomfortable, but my beloved is outside early every morning working alone on the task at hand. Fortunately before he went to university to become a high school teacher he was a motor mechanic so he has all the skills and experience necessary.

We didn't get to go away for that holiday we were planning after all. The Jeep parts took 6 weeks to arrive from the USA and it's a huge job to get the car back and running before school starts, so hopefully over the Easter break we can finally head into the outback or the rainforest for an adventure. 

Life is full of unexpected ups and downs, but if you stay positive and make the most of what each day brings there's always joy to be found.


Just having my man home with me, being able to make him a hearty meal at the end of the day and laugh with him over the antics of our Cully May, helping Blossom do her washing, enjoying morning tea at a friend's home, sewing pretty things...that's the kind of ordinary which brings me joy.

May your ordinary bring you joy too.

hugs


Thursday, December 29, 2016

More of "My Simple Sampler 2017"...

Since Christmas afternoon it's been our routine to settle down each day to watch a few episodes of 'All 4 Adventure' from the DVD set I gave Mr E on the big day.
Those few hours of relaxation, feet up, air conditioner cooling the house, and some leftover Christmas nibbles to keep the taste-buds happy, have allowed me to complete more of the "My Simple Sampler 2017" project which my Stitchery Club members will receive in their January issue.

Everything is embroidered now, except the running stitch borders and my name at the very bottom of the Sampler. 
Another day and I'll have it ready to frame or border as a mini-quilt. I'm still considering my options, but am hedging towards the mini-quilt finish.
What do you think?


Memberships close on January 5th for the next issue of The Stitchery Club.
Join today or find out more here on the Club page.

Oh and there's a free gift pattern for new members, "Made with Heartstrings".

"Made with Heartstrings" is also available as a single purchase PDF pattern here in my shop.


25 years...
Dear Mr E took me to our favourite Indian restaurant last night to celebrate our 25th wedding anniversary with a very quiet, very us, dinner.
I'm giving thanks today for a quarter century beside this man, and for all the blessings yet to come.
Thank you, Lord.

More stitching...
Have you settled back into some stitching time now that Christmas has passed?
I'm about to trace off one of the six "My Simple Sampler 2017" designs and stitch it as the cover of a small project which I'll show you after New Year.

Have a wonderful day!


hugs


Wednesday, November 30, 2016

The pink and green idea...

I think it may have been about a year ago that I went through all my pink and green fabric scraps and cut 100, 5" squares to make a simple quilt. 
At the time my plan was to have it made within a few weeks, perhaps a month - after all it was just a case of sewing together the squares and adding two borders - but life stepped in and the little tub of pastel squares was stowed away under work projects and completely forgotten until last month when they were re-discovered.
As well as the one hundred 5" squares I had also put aside a piece of floral yardage and a half yard of green tonal fabric for borders and binding plus a few 5" wide lengths of extra prints 'just in case' I needed more squares. 

Such pretty colours and fabrics, I thought they deserved a little more care after waiting so long for their moment to shine so when I was choosing the thread colours for December's Stitchery Club designs they were inspired by these fabrics. 
I had the idea that perhaps I could scatter some embroidered blocks through the quilt when I eventually make it?

Now the only thread you won't find inspired from my pink and green quilt fabrics is the blue and that's because I needed a contrast colour that would allow the stitchery blocks to stand out from the quilt.

(the 'blue' decision was made after a jolly good chat, large coffee and generous slice of cake with my friend Heather one Friday)

Have a look at the blocks below.
See how the little pops of blue prevent the embroidery from getting lost in the fabric. If the stitcheries were all pinks and greens, even with that tiny touch of lemon at the centre of the flower, they would lose quite a bit of impact...


I do hope the picture in my mind for what may become a lovely lap quilt actually eventuates.

One of the six designs is long and not very high, making it perfect as a border for the bird block if I stitch it four times and add small fabric squares in each corner...
...which would then make the centre of the quilt a 'medallion' and I quite like that idea.

This project will not be a quick one but hopefully it won't languish on the shelf for another year either. 
As I play around I'll take some photos and you can watch my progress and perhaps you can cheer me on from the sidelines? 

2021 UPDATE: Pattern set is now available HERE


Tomorrow Allie will be sharing the final block in our combined 2016 BOM, "Postcards From Heaven". Hasn't this been a wonderful year of free Scriptural stitcheries?
You will love the December postcard!
Here's a sneak peek at my version of Allie's design...

In my next blog post I'll show you the finished block and also the project I made using the completed Postcard stitchery.

These would be lovely as a holiday project and then stitched into a wall hanging  or quilt. 
And what about as a gift? You could trace them all on fabric, purchase threads, pack them in pretty paper and gift them to a friend who loves to embroider. Sounds simple, but they are often the most appreciated gifts to receive...

be blessed,


Tuesday, November 15, 2016

TUTORIAL - pincushion with a secret...


I said I'd share four pincushion tutorials this month, and I really do try to keep my word. 
The first three styles came easy to me because I designed them before I made them, but this fourth pincushion pattern wasn't quite as accommodating.
It wasn't due to lack of an idea, but rather because I had three and could only use one.

So this morning I stood silent in my sewing room with fabric, stitchery, buttons and a blank stare for the longest of times, hesitating to pick up my scissors or the rotary cutter for fear of making the wrong decision and regretting it soon after.

I like the quilter's rule, "measure twice, cut once", because it makes you sure in your mind before you embark on a journey of no return with regards to slicing and dicing a perfectly good piece of fabric, but try as I may this rule would not work with my 'which pincushion should I make?' quandry.

I decided to gather yesterday's washing off the clothesline, put the breakfast dishes away, and decide on a menu for tonight's dinner - clearing my mind of what perplexed it most. And you know what? It worked!
I didn't have to choose between those three pincushion ideas after all because I came up with a completely new pattern instead!!

There really is wisdom in walking away and doing something completely different to rest your little grey cells. I think Hercule Poirot would approve of that?

Shall we begin?

The stitchery on the front of the pincushion (Sew & Sew) is one my Stitchery Club members will receive in their November patterns on Thursday. 
If you are not a Stitchery Club member you can purchase the November issue from my shop on that day. 

BUT what about using a stitchery you already have or fussy cutting a piece of pretty fabric instead!?


To make a pincushion the same size as mine trim your stitchery to 3 1/2" x 7 1/2".

You will also need -

A fat quarter of feature fabric from which you will cut -
one, 3 1/2" x 7 1/2" piece
two, 5 1/2" x 9 1/2" pieces

Two, 5 1/2" x 9 1/2" pieces of fusible Parlan or thin fusible Pellon
One button
Crushed walnut shells or polyester stuffing

Let's Sew!

Place the stitchery right side down on the 3 1/2" x 7 1/2" piece of fabric  and pin all the way around.
(note: I have cut my fabric larger so that it's easier for you to see in the tutorial)
Sew the two pieces together with a 1/4" seam leaving a 2" opening along one narrow end.


Turn right side out, and blind stitch or ladder stitch the opening closed.


Fuse the Parlan (or thin Pellon) behind the two pieces of 5 1/2" x 9 1/2" fabric.


Centre your stitchery on one of the pieces of fabric and pin in place. 


Secure the stitchery 'pocket' to the fabric by sewing a line of running stitch with 2 strands of embroidery thread across the top, left side, and bottom of the 'pocket', about a 1/4" inside the edge. Leave the right side open.
I used a cream thread to blend with my stitchery background fabric.


Sew a button in position about 1" from the top right edge of the stitchery 'pocket'. 


Lay the remaining piece of fabric right side down over the front of your pincushion and pin the two pieces together. Sew around all four sides with a 1/4" seam. leaving a 3" opening along the narrow end opposite the button end. 

Turn right side out, gently pushing the corners out with a large rounded tool such as a big wooden knitting needle or a chopstick.


I chose crushed walnut shells for this pincushion because I am using the pocket to hide my scissors therefore I need the pincushion to sit flatter than a polyester stuffed one would normally be inclined to do.
(If you use polyester stuffing, don't over fill this pincushion.)


The easiest way to fill a pincushion with crushed walnut shells is with a kitchen funnel.

Fill the pincushion about 2/3 of the way but no more.
Slip stitch or ladder stitch the opening closed, keeping your stitches very close together.

The final step was to make a little twisted tie for my scissors from six strands of embroidery thread and then I could hide them inside the pocket of this pretty new pincushion!


Now you've seen this made, I'm pretty sure you can figure out how to make the same kind of pincushion using stitcheries of different sizes. In fact, you could omit the hidden pocket too, if you like. 
We've all got some UFO stitcheries, cross-stitches, mini quilt blocks...perhaps you could give them a home as pincushions and get a head start on 2017's birthday or swap gifts?

Whatever you do, be sure to have fun!


Would you like to see my smallest pincushion?
When Blossom was a wee little thing, long before I taught myself to hand embroider, she would sit and sew tiny bits and pieces for her dolls and sometimes she'd come out with precious things for me.
I could make simple dresses for her or her sisters, and I could hem curtains and do some rather nice cross-stitch by following a pattern, but that was the extent of my sewing skills pre-2005.
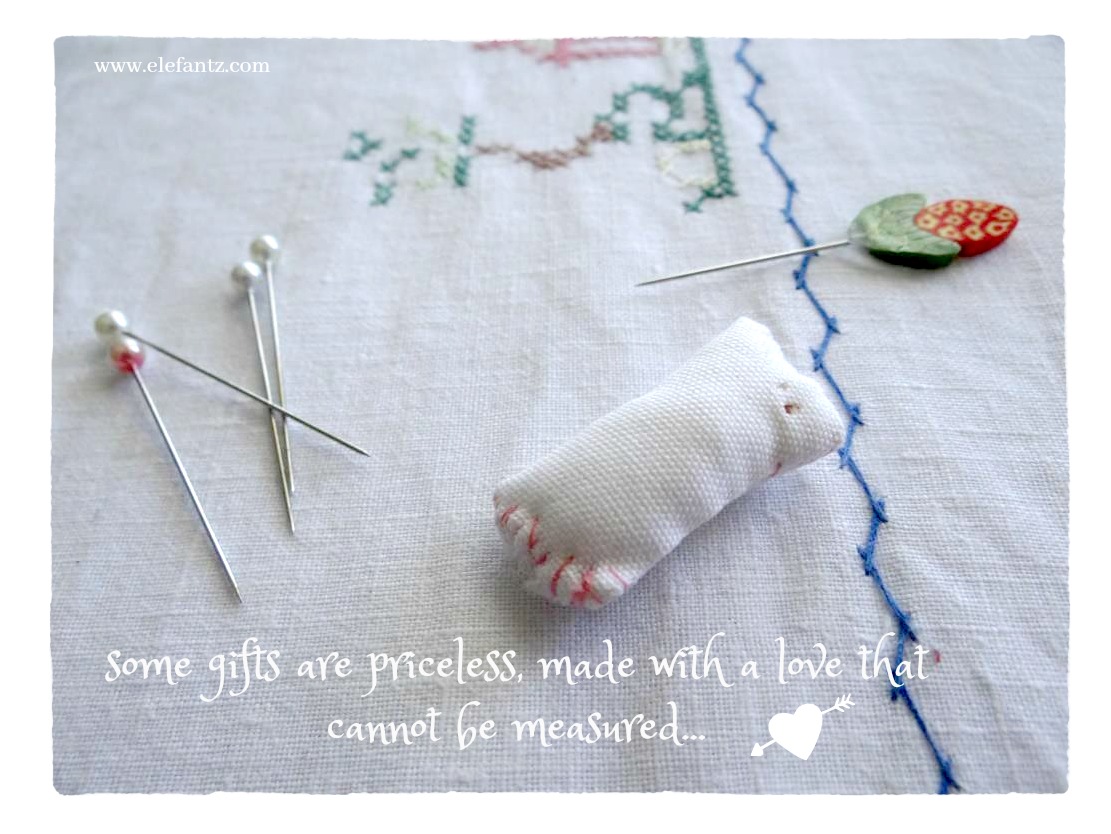
One day, whilst I was relaxing with a newly purchased cross-stitch design, she drew close to my side and gave me this precious little pincushion as somewhere to keep my needle when not in use.
It's only a inch long and tightly packed with scraps of thread. She was just a small child when she made it and completely self taught with needle and thread...


I think you can appreciate why I treasure it so.

What small things in life do you hold dear?

hugs