Showing posts with label redwork. Show all posts

Friday, September 11, 2026

Redwork rice bag, and Cully May...

 Well, wasn't it a bit strange to have commenters unable to leave their comments on Blogger blogs last week? Many of my blogging friends had the same problem as me, and though we tried leaving comments on each others blogs (multiple times) it just would not work for days. Apparently Blogger updated everything but a glitch was found in the comments update so it took a couple of days to get that sorted, but thankfully we're all back to normal again. :-) If you took the time to leave a comment on last week's blog post and could not get it published, thank you for trying. It means a great deal to have you write back to me, and share your own thoughts and experiences, as well as updates on how your own days have been. (((hugs)))

This week had ups and downs at our place. After doing a bit better with my leg/knee situation for a few weeks, I found this past week to be akin to "taking two steps back", so lots of rest times were required each day between home and garden tasks. I admit to feeling a tad frustrated at this unpredictable roller coaster effect on whether I have good days/weeks or the more difficult ones, BUT...every day has it's own rhythm, and no matter what, I seek out opportunities to do what I can around home, and also to be creative with my hands during the needed intermittent hours of resting my leg. 

Last weekend I decided to begin a new project, one that has long been on my list of things to learn or make. In last week's post I wrote there were six things on my list which I hoped to do in the months ahead, and as I needed a lot of down-time this past week, I chose to start with some redwork slow stitching and the making of a Japanese rice bag. 

Many years ago I purchased some pieces of vintage French linen, the kind with red stripes and a bumpy weave. I've read that many people do not like hand-stitching on this kind of linen, preferring smooth fabric instead, but I really love how it can give a more rustic finish to hand embroidery so I chose to finally make use of it all.


I began by drawing up four little designs to stitch, which would incorporate a bit of applique. The white French linen fabrics (above) with the thick red lines were to be my embroidery backgrounds, and the fuller red striped fabric behind them is repurposed from an old linen top I had. Together they worked beautifully for what would eventually become a rice bag. 

I blanket stitched the applique pieces with a single strand of off-white thread...


Using the white thread allowed the applique to blend more easily into the linen background, rather than standing out and taking centre stage in each of the embroideries. 


Each day I would embroider one small block, and took my time to use different stitches, or add lines of running stitch - my sketches are a basic rough outline and any enhancements are made during the stitching. 


It's been a while since I did a design just in redwork, but the vision in my minds eye of a vintage style well-loved rice bag was a project I was excited to finally create. 


Rice bags are made in many sizes, but I chose to make a small one, with the base and all four sides measuring 6" square, so that should give you an idea of how small the stitcheries are. 

I waited a day before sewing the sides together and finishing the rice bag, because I like to give myself a bit of pondering time before the end of a project, just in case a few changes or new ideas come to mind. I was still not sure whether to line the bag with more of the striped linen, or whether to use plain white linen. 
The white linen won in the end, and I also used it for the double drawstring closure. Once the bag was completed (yesterday) my heart was so very happy with how it turned out because it's even nicer than I'd hoped. 


Once it's sewn, each side and the base measures 5.5" square. The lining is made the same as the outer bag but with no embroidery. Across the top there are channels, one on each of the sides, to thread the drawstrings through...


Now you may be wondering what I'll use this sweet little bag for? First I shall draw up a couple of new designs for more redwork using leftover fabrics from the rice bag, and then I will use them to make a small needlebook, scissor fob, and pincushion to keep inside the bag. 
Embroidering small projects is one of my favourite things, and this little bag will be perfect for storing what I need, plus a project-on-the-go. 

On my pondering day, between completing the embroideries and eventually sewing the bag together, I did a little more redwork to personalise a couple of Japanese style cross-back aprons I'd purchased recently from Temu. I genuinely like these cotton aprons, and am thrilled with the quality. Not having to tie apron strings or adjust neck ties, these simply slip over your head and cover the body very comfortably. The cotton fabric is thin admittedly, but I've not had a problem with that, especially as our tropical summer arrived this week (completely skipped spring!) and thin cotton or linen clothing is once again a must. 

What I did not like was the little decorative tag on the front of each apron, and as I had some nice thick cotton twill tape in my drawer (came wrapped around sheets we purchased last year), and red thread on hand, I decided to personalise my aprons and drew up two tiny embroideries to replace the generic ones that came with the aprons. Much nicer...


My week of redwork costs me nothing but time. It's so much fun using what you have, especially what you've had for a long time and waited to use 'one day'. My outlook on life is very much about using the good crockery all the time, making things with special fabrics I collected years ago, and enjoying all that we have today. Why wait to use what's already in my possession? And why waste money on buying more when I have enough now? 
I thank God for all He provides, and for the commonsense needed to create beauty from what is already in my hands, the things He has gifted me with and allowed me to source over the years. 

One more thing before I close off this post. I'll be having some regular days with Cully May as my companion and helper. You know, she turned 10 last month! Many of you will remember her birth back in 2016 and the JOY of seeing our precious Blossom bloom into motherhood. I still can't believe its been a decade since I held the first of three babies...I am a blessed Nana indeed!
Anyhow, Cully May and I love spending time together, but it has not been as often since my accident last year, so Blossom and I decided we'd make a regular day of it, and this past Wednesday we began. 


We took a trip to the library (just up the road), had an early lunch in the library cafe, and then back home to watch a favourite show, The Great Australian Bake-Off. 


Ever since she was a toddler, Cully May has loved watching baking shows with me, and this particular day we got inspired to make a few simple things before Blossom arrived to take her home. 
Firstly we made Hedgehog Slice, a family favourite, and as a bonus it's a no-bake recipe (we used THIS recipe). She was able to take most of it home for the family to enjoy, but left a few pieces here for Poppy to enjoy after work - which he did!

Then Blossom arrived an hour earlier than expected, so we raided the garden for tomatoes, leeks and basil to make a sauce, and cooked fried gnocchi which was then folded through the sauce with some fresh garlic, cream and a squeeze of lemon juice. It is one of my husband's favourite meals and was a real hit with Cully May and Blossom as well. 

Cully May took this photo of us...a bit blurry and a tiny pic, but so very special.


I hope you enjoyed today's blog post. Last week I received notifications from some of you that yes, you would like me to share some of my favourite YouTube channels, so I'll have that done for the next post. 

In the meantime, my prayers are with you and for you. May your hearts be full of joy and gratitude for what you already have, and I pray the Lord will bless you with extra creativity to make your home even lovelier by the addition of what you can make with your own two hands. 

Much love!!
Until next time,

PS: My Etsy Shop is always open, so please drop by if you are in the mood for something new to stitch.


Friday, March 3, 2023

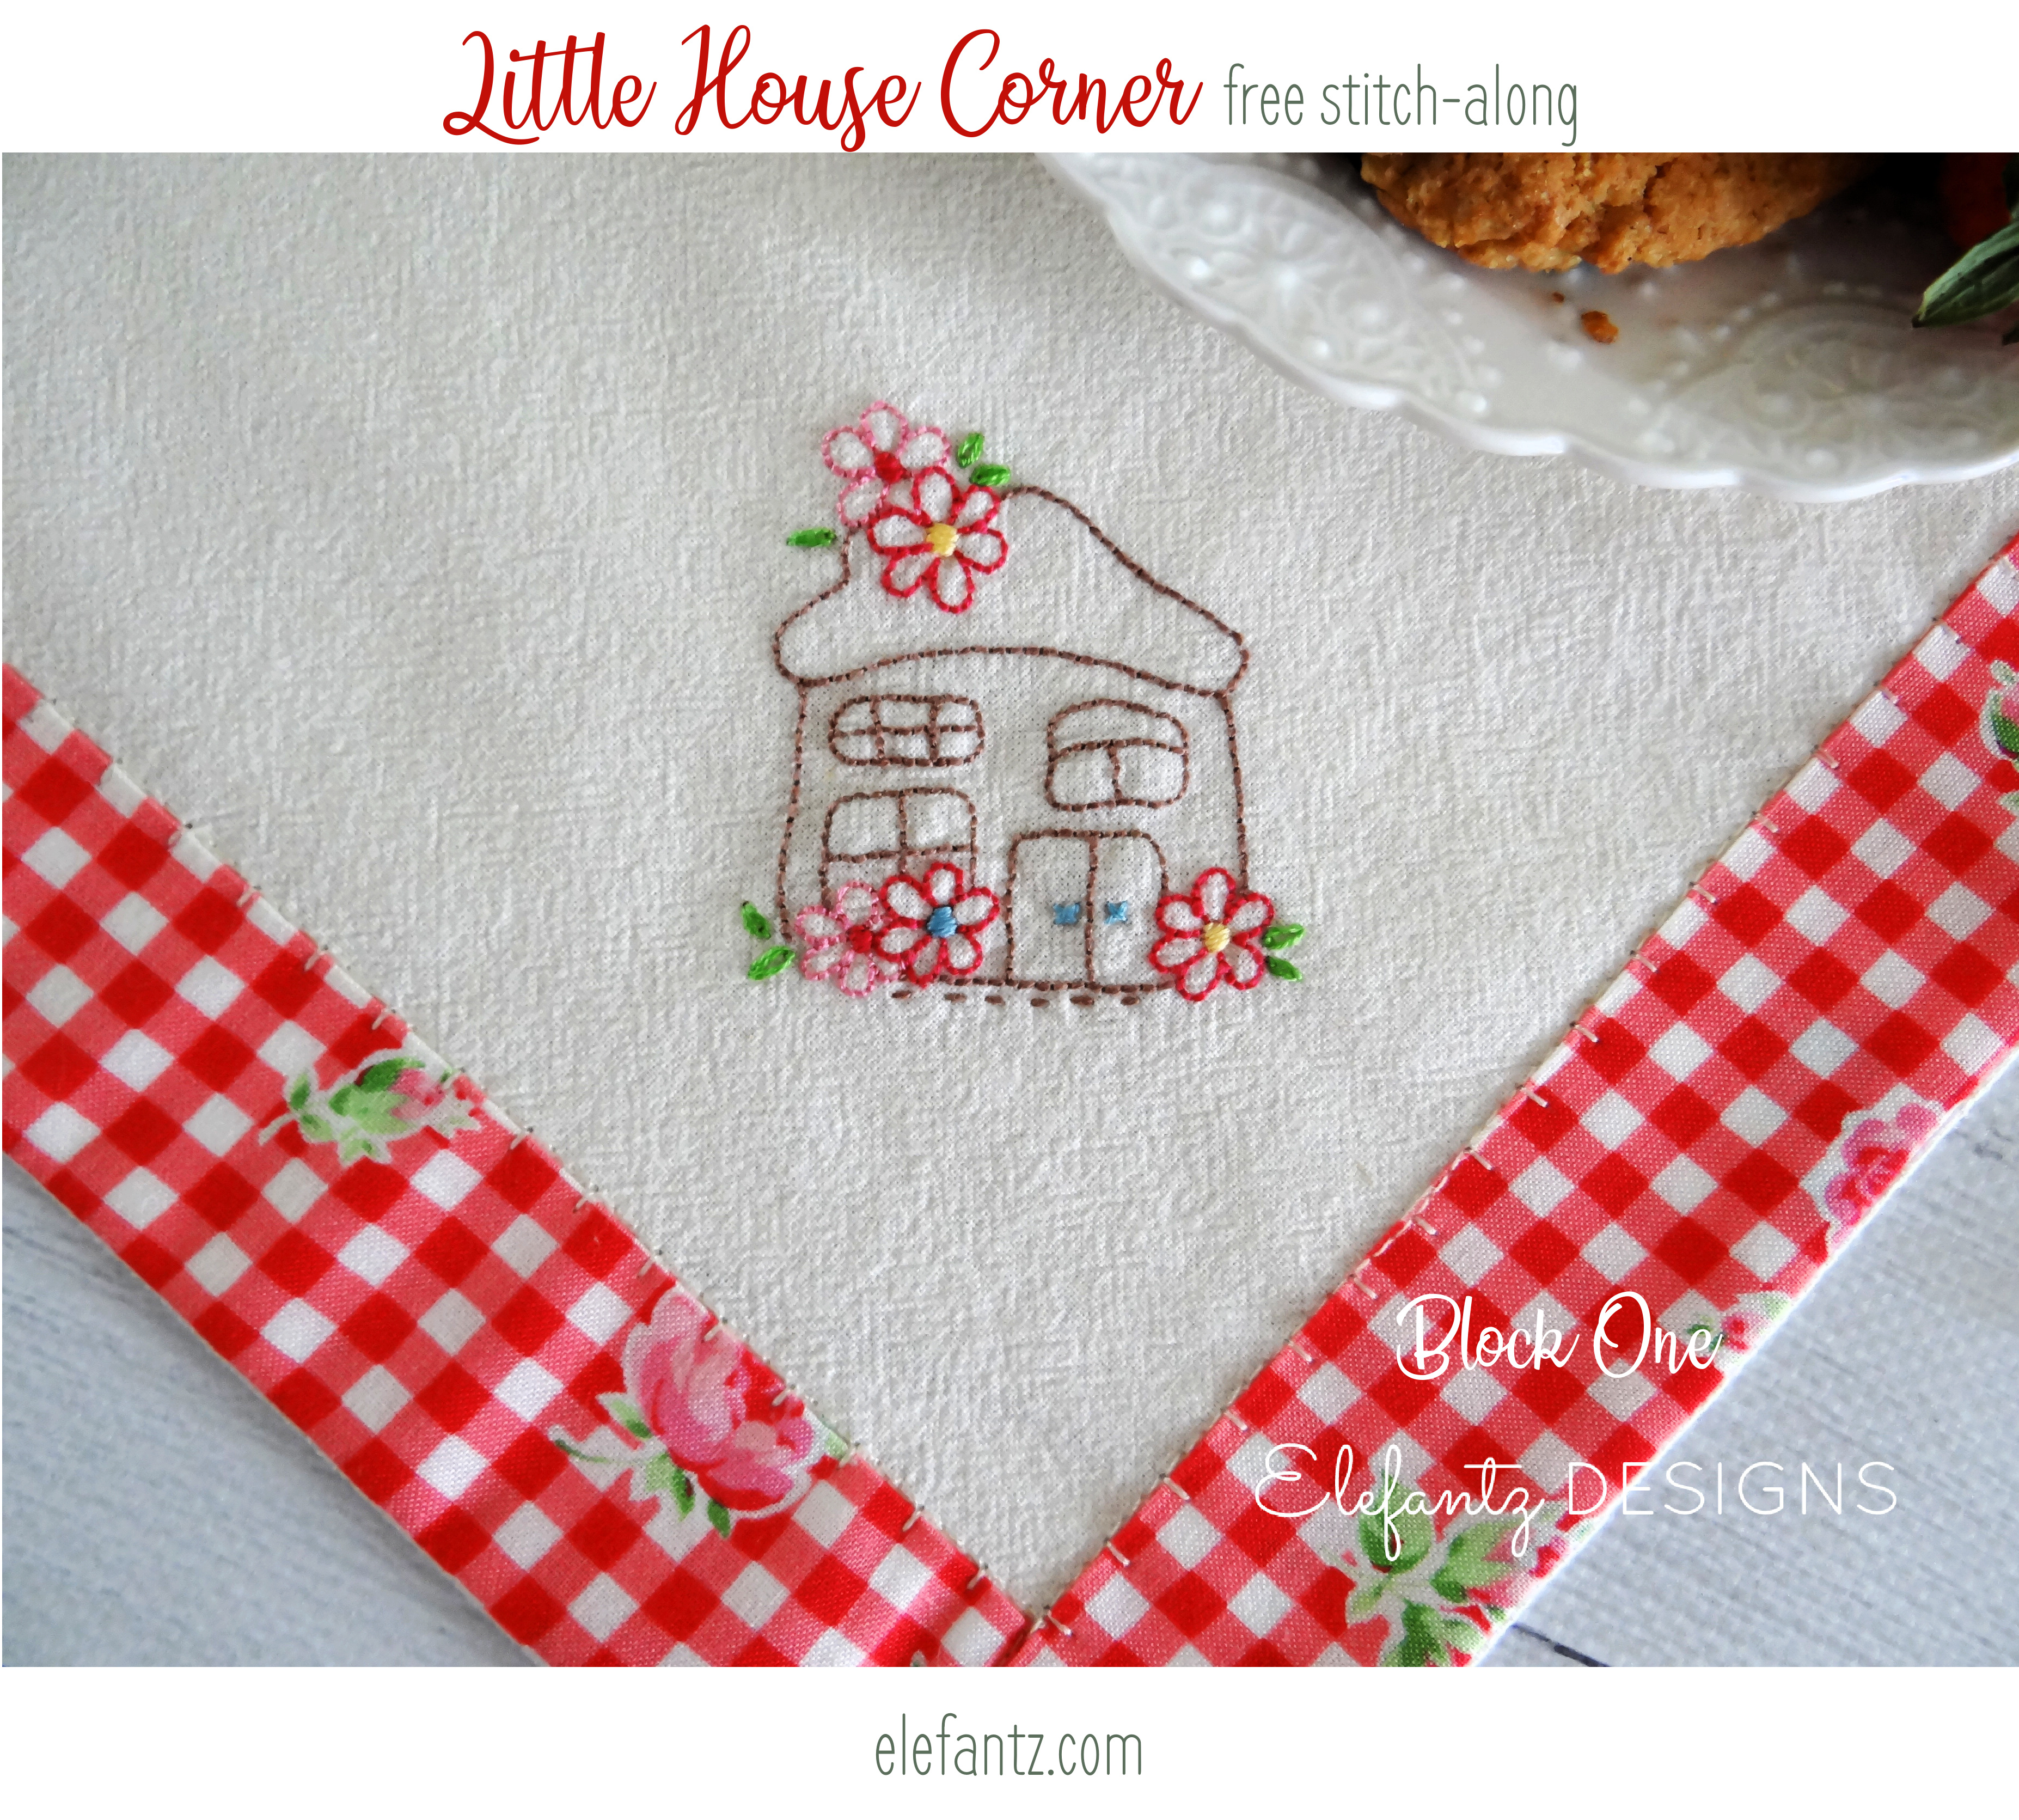
Week 1 Little House Corner Stitch-along...


Good morning! Today we begin a four-part stitch-along which I'll be sharing with you throughout March. 
I named it Little House Corner because we shall be stitching four cute little houses into the four corners of a simply bordered cloth. Your cloth can be made of any solid or tonal fabric you like, however, I have stitched three of these small supper cloths (table cloths) using authentic unbleached flour sack. A lovely floral gingham print border adds a simple sense of homeliness to the completed project. 

If you missed last week's tutorial for creating a bordered cloth, you will find it HERE

Today, before we start embroidering our first little house, we need to position the design in the corner of our bordered cloth. I did a tutorial for this back in 2017 when I made my first supper cloth, which had a summery yellow border and the same little vase of tulips in every corner. 
The tutorial instructions from 2017 for correctly positioning a stitchery in each bordered corner is the same as you will use for all four houses in our 4-part stitch-along, except that you will be stitching four different houses instead of one repeated design.

1. Print the design you wish to embroider and gather a pencil and quilters ruler. Because my tablecloth is a square the corners are a perfect 90 degree right-angle, as you can see below.


2. Decide how far into the corner you want your embroidery and after positioning the ruler over the design use a pencil to trace the corner under the design.


3. Place your fabric over the pattern sheet and line up the corner pencil lines with the corner of your fabric before tracing the design. I did not trace the cloth under the vase, as you can see. 


(The little vase design is one of the 12 stitcheries in my Scrappy Vintage Kitchen pattern HERE)

So let's make a start on our Little House Corner supper cloth today, shall we?! 
This week we're stitching house number one, so print up your pattern sheet and follow the instructions above for tracing the first house into one corner of your bordered cloth.
The embroidery instructions are on your pattern sheet. 

Use the link below to download the first little house pattern.


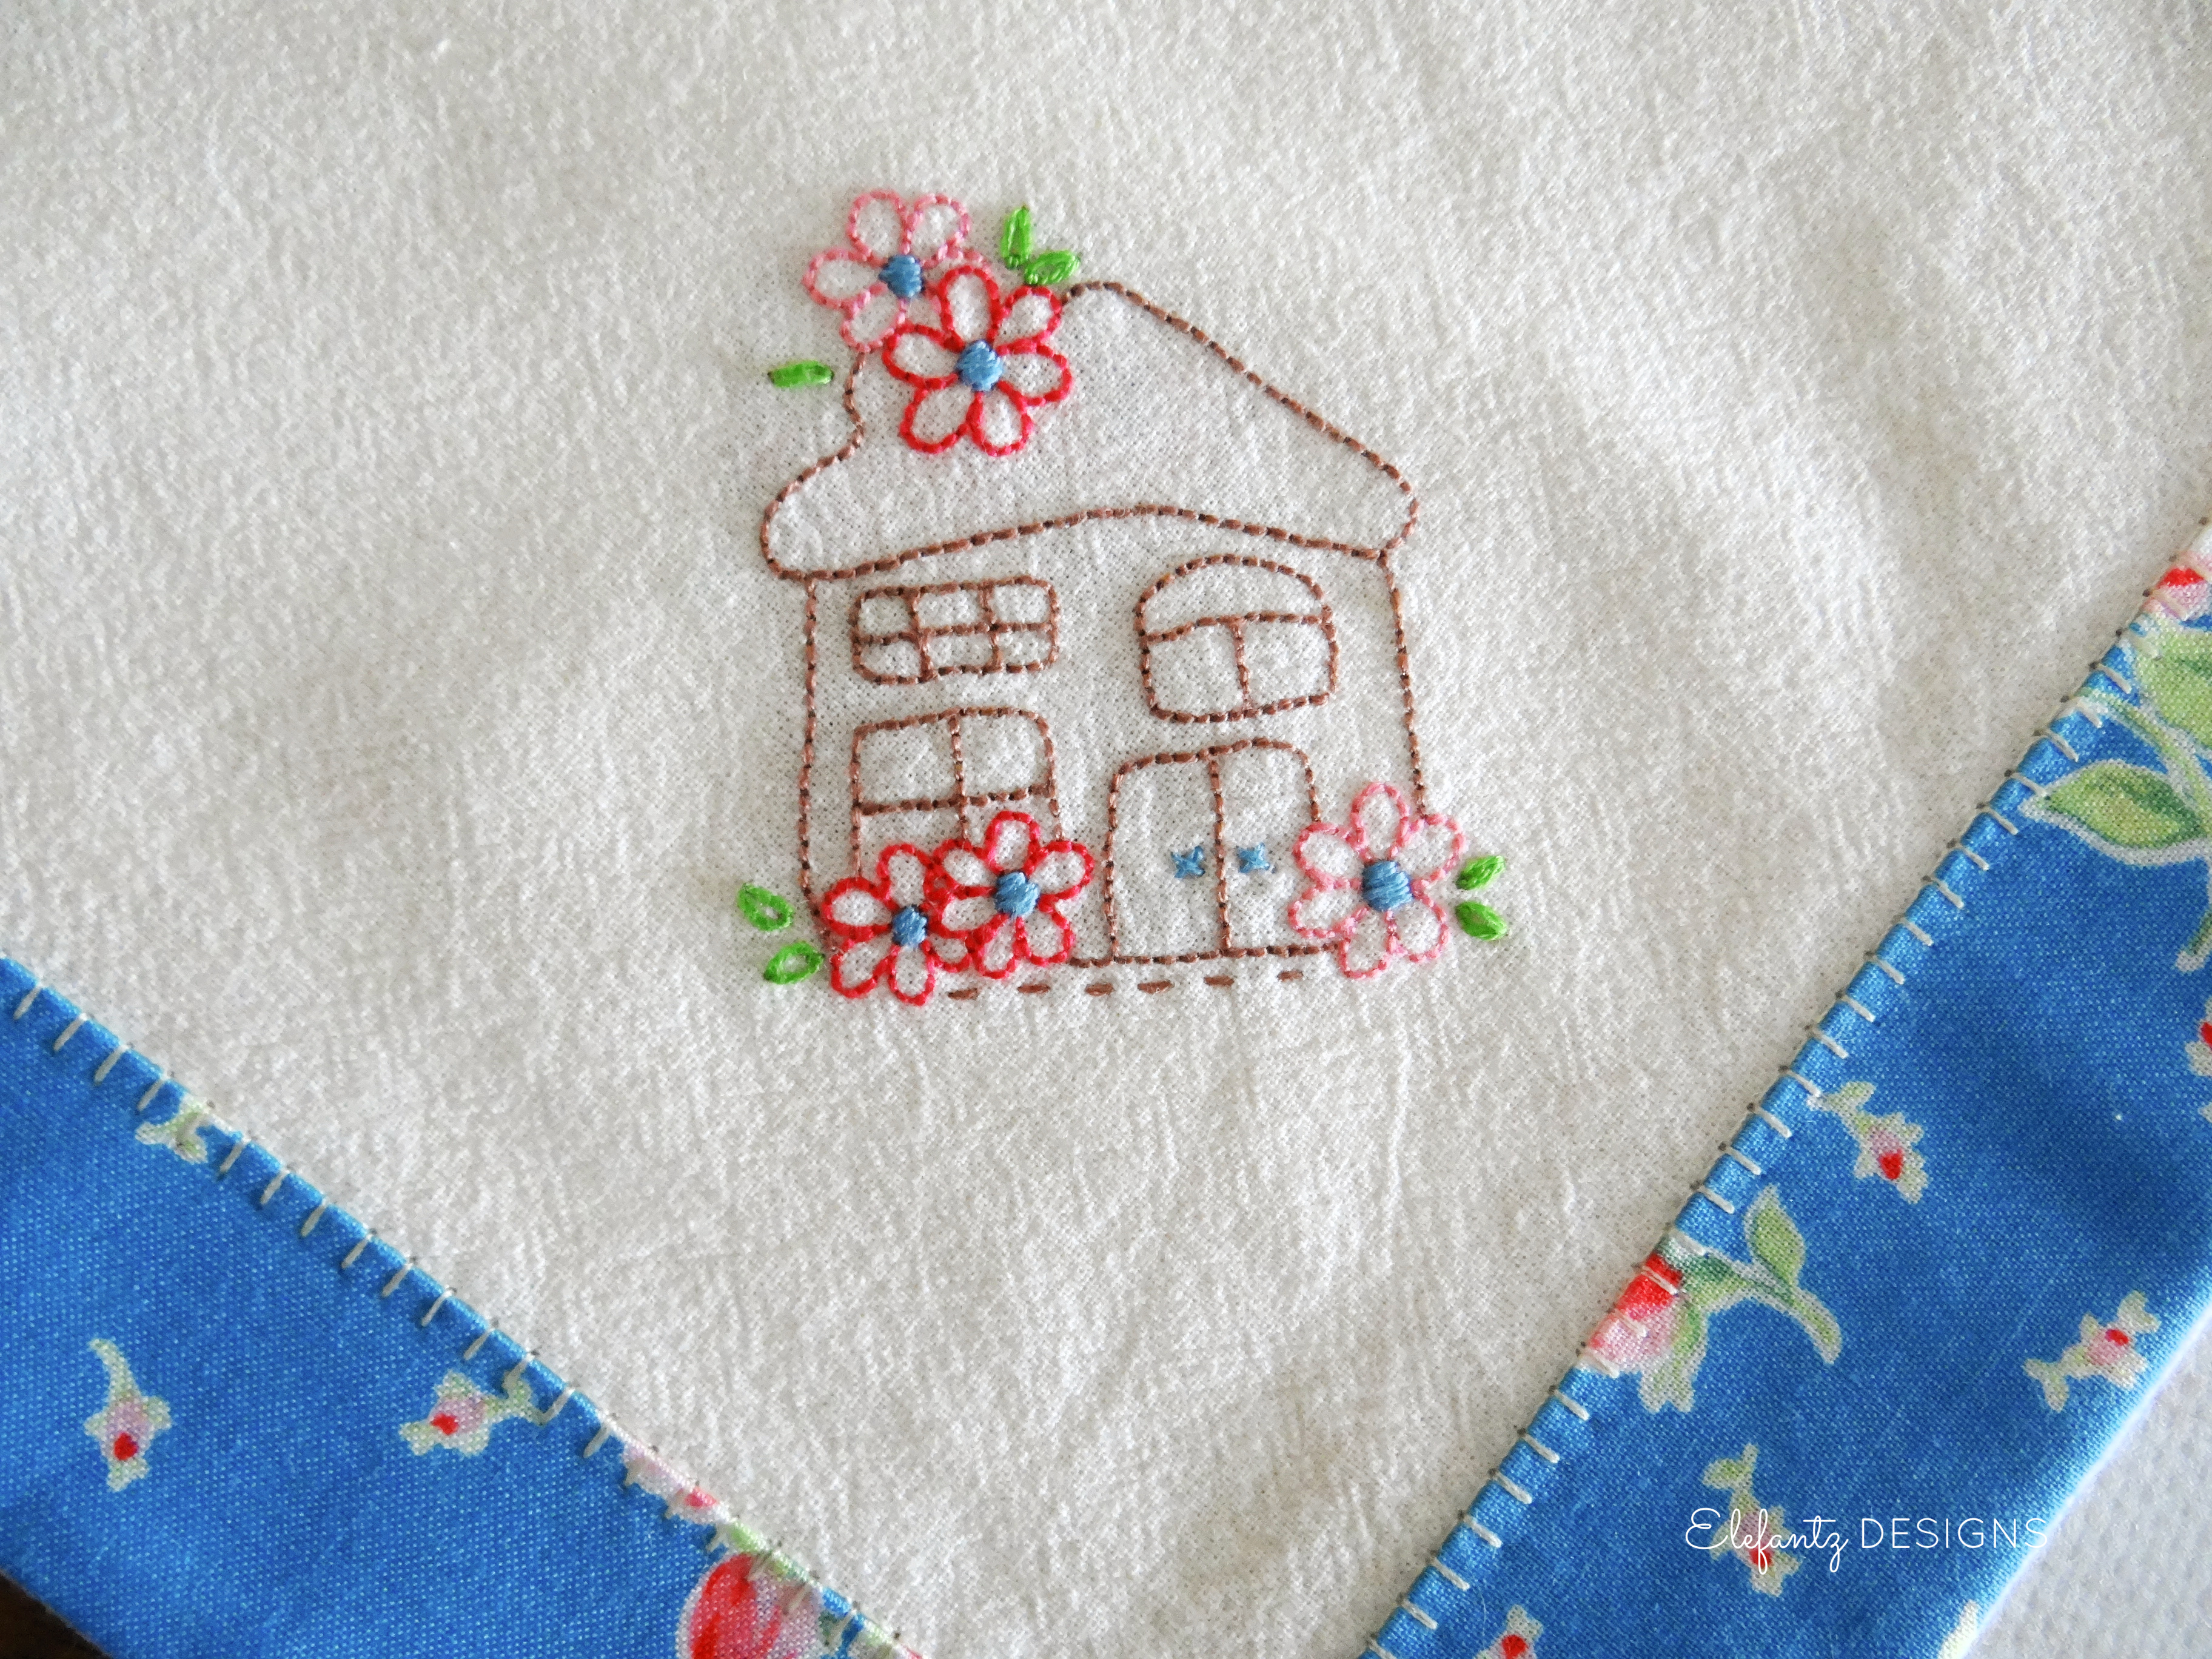
I have previously stitched two Little House Corner cloths, one for myself and another for my friend Rosie. Mine has a red floral gingham border and hers has a blue floral border, which blends well with Rosie's calming blue and white home decor. 

I was at Rosie's yesterday and wanted to show you how she uses her supper cloth. We always have a lovely morning tea before we stitch and chat about recipes, the garden, homemaking and family, and I absolutely love how she placed a red gingham tablecloth on the table first, then the supper cloth diagonally over the top! I instantly thought of a farmhouse kitchen and couldn't help but smile with delight.


Here's the same little house you'll be stitching this week, but bordered in blue...


Choose thread colours which blend nicely with your border fabric. I did not fuse any stabiliser behind the stitchery corners as flour sack is quite a sturdy fabric and it was not necessary. It's entirely up to you whether you want to add a stabiliser, but I think if you don't carry threads across the back of the design, but secure them when each coloured section is complete, you will be fine without it. 

Here's the back of my little house so you can see what I mean...


And here's the back of my tulip supper cloth as well. This cloth is almost six years old now and has been washed many, many times. I hang our washing out on the line in the bright tropical sunshine, and it has worn very well. I've never had to repair the border or any of the hand stitching...


I'd love to see your cloths coming to life, so if you have a blog please leave a comment with a link to it so I can come take a peek. If you're on Instagram use the hashtag #littlehousecorner so I can find you, or drop by my account @jennyofelefantz to say hi and let me know.

MORE news!
It's been a while since I added a brand new pattern to my Etsy Shop, but as you probably know, I've become a bit of a redwork lover the past couple of years, and combined with my love of home, this new design kind of made my heart sing.


"Always Be Home-Hearted" is a PDF download from my shop, so you could fill time stitching it in between the weekly Little House patterns this month.

The design is mostly backstitch, with some satin stitch, French knots, running stitch, lazy daisy and cross stitches scattered throughout. 


The mini-quilt measures 12" x 13.75" and was stitched onto a white cotton/linen blend background. Borders of assorted red fabric scraps complete the project. 
Imagine it in blue or green...mmmm. Nice. 

You'll find the pattern HERE

I hope you enjoy stitching the Little House Corner, my new redwork pattern, or something else from your sewing basket over the weekend. I believe when we have a heart for home, that love grows the more we tend and nurture it. For me, there's real delight in adding handmade pieces to our home - just as I gain joy from baking a loaf of bread, filling jars with hot jam to fill the pantry, or folding sheets fresh off the clothesline. When our hearts are turned towards home, when we actively choose to participate in creating a safe and inviting sanctuary within our walls, when we slow down and appreciate what is right before us...we are not just blessed, but become those who give a blessing to others.

God bless you, 


Don't miss out on any Elefantz news or free patterns. 
Subscribe to my blog posts HERE and receive them direct to your email inbox.  

Or sign up HERE for my free newsletter which often has extra benefits, freebies & tutorials!


Tuesday, November 17, 2015

Redwork & apple pie...


My prayer-partner-and-forever-friend Allie has just shared a beautiful Redwork Christmas pattern on her blog and that got me thinking about how wonderfully comforting and homely I find Redwork embellished items to be.

Here are some especially useful designs which I imagined being just right for displaying on Christmas gifts or included in the festive decorating of our homes.


First of all HERE is Allie's joyous free pattern, Oh Ho The Mistletoe...


THESE cute chooks by Shellie Wilson are definitely going to be added to my personal stitching list...


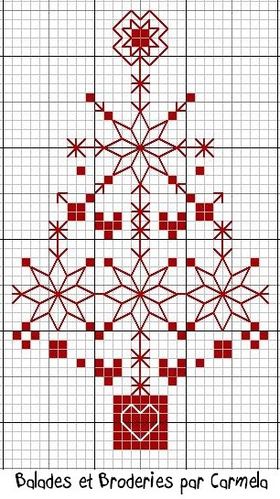
Love cross-stitch? THIS tree pattern from a French designer is gorgeous...


 What about a lovely Redwork heart? You could sew one of THESE monogram initials into the centre!
The heart pattern is HERE on Mary Corbet's wonderful site...


And don't forget that my nine Redwork blocks from The Vintage Kitchen are still available as free downloads HERE in my shop until December 31st...


It's very relaxing to stitch a Redwork embroidery, isn't it?!
Just one single colour.
Love it!


If you love Apple Pie but can't have a wheat or gluten crust, you may like to try the pie I made last weekend...


I've shared the full recipe over HERE on my Cooked Simply, With Love blog.
There's also a quick recipe for making Vanilla Coconut Cream (in case dairy is your nemesis).

Today Mr E are I have a little adventure ahead of us.
No idea how it will turn out, but it could be life changing.
And then again, it may all be a fizzle of nothing much at all.

Either way, it's not bad. Just different.

Have a wonderful Tuesday!
hugs

Monday, September 28, 2015

Block 3 - HOME...


Today we're going to be stitching the HOME block of The Christmas Wreath!

Have you finished the first two blocks yet? LOVE and FAITH are still available as free downloads if you've joined in my Stitch-Along a little late.

All three blocks shared so far can be downloaded instantly HERE in my shop. 
Remember - these blocks are only free until October 31st.

This is what your wreath will look like when it's finished...


The material and thread requirements for making The Christmas Wreath are also a free download from my shop.


Would you like to see some of the blocks others have been making, or be inspired by their fabric choices?
In fact, if you're planning to stitch along we'd love for you to join.


Do you like redwork?

I've put together this little stitchery set as a welcome gift for all new members of The Stitchery Club, but I've also added the pattern to my shop in case others would like to make them up as well.
They're perfect on sewing sets, needle-books, pincushions, or as small embellishments on cushions, journals or bags...


The pdf pattern is an instant download HERE in my shop for just $4.
Imagine what you could make with them?!

But perhaps you'd like to join The Stitchery Club before October 16th because then you will receive this pattern set as your free welcome gift.
All information is over HERE on the Club page with previews of a few of the new patterns for October. 

Thank you for your prayers and wonderful messages during my unexpected head and chest cold season. I'm definitely mending but not quite over it just yet, so I may take things slower on the blog this week and rest up that little bit longer.

bless you heaps,