

My friends know that I really do love a pretty tea towel and by now I think you know that too?
Last year a good friend sent me this particularly lovely Morgan & Finch apron and I washed it in the New Year, intending to use it in the kitchen, but it was just too pretty and I knew if I waited long enough a better idea for it's use would cross my path.
Which it did the other day.
I was flipping through a favourite retro cooking book looking for an old recipe when I remembered the tea towel apron featured inside. As you can see below it's just cutting elongated triangles from each corner to make the top of the apron and then ribbons are sewn in place for the neck and back ties.

Not a fan of ribbon ties with aprons (because I really use my aprons and have been known to wear them into a state of complete disrepair) I chose some many-years-old complimenting fabric from my stash for sturdier ties.

As with most things I find in books certain liberties were taken to alter the basic structure to suit my own size and requirements...and along the way I thought it might be good to share a few sewing tips that make my everyday attempts much easier.
TIP ONE:
...is to WASH THE TEA TOWEL FIRST because it will shrink. In fact I've never had a tea towel not shrink and I've never had one that was perfectly rectangle. After washing this one earlier in the year it was simply folded and put away (hence the crinkles) but when I ironed it before making the apron it was obvious that I needed to trim the bottom edge as one side was an inch longer than the other. So, do check this before you continue on.
I measured the towel up against my body and made a pencil mark on one side for where the top and bottom of that elongated triangle needed to be cut away and promptly folded the tea towel in half before using the rotary cutter to remove it from both sides. You can see below that I also needed to make a new hem, which wasn't a problem as I'm a little over 5'1" tall and losing an inch from the tea towel made it a much nicer length for me at the end.

I cut two lengths of fabric 3" wide x WOF (that's width of fabric from selvedge to selvedge, usually around 42") for the waist ties and one length of fabric 2" x WOF for the neck.

The Waist Ties...
Fold the individual fabric 3" x WOF lengths in half along their length, right sides facing, and sew a 1/4 inch seam down the entire long edge and across one end, leaving the other end open. (see the next tip before you do this)
TIP TWO:
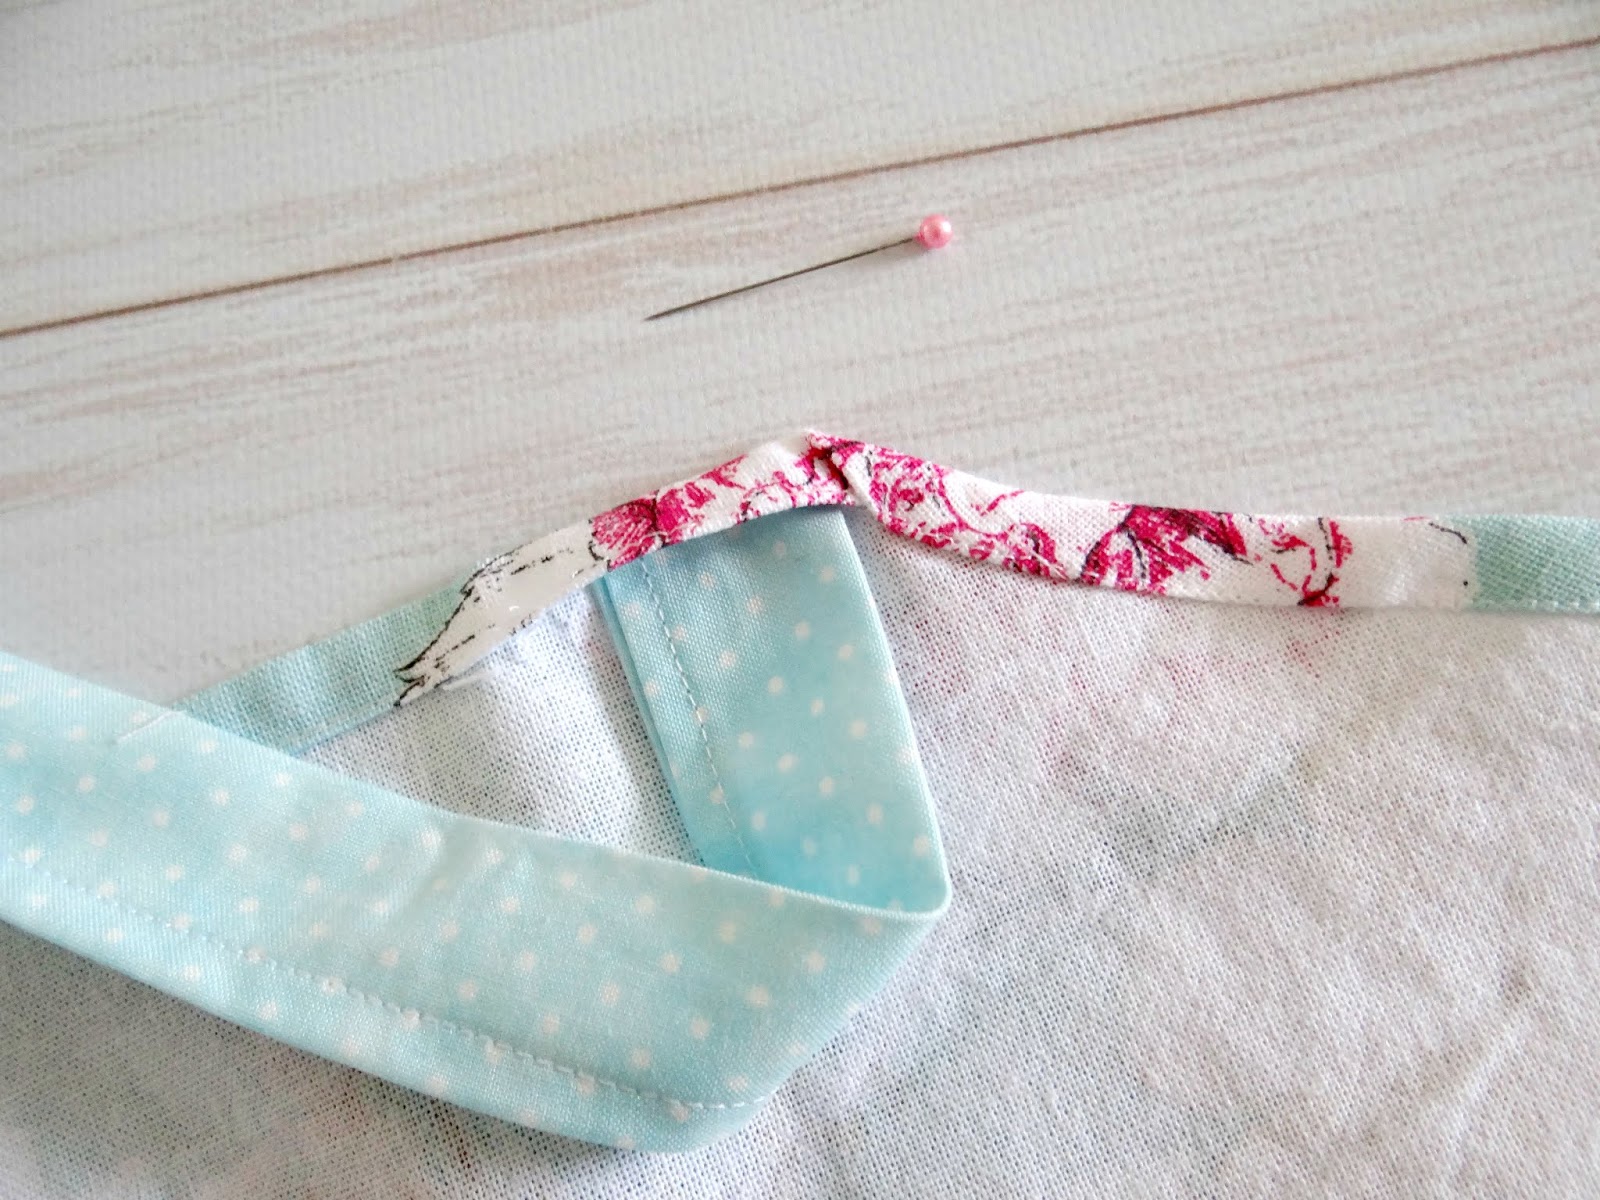
Curve the sewing line at the narrow end so you can have a lovely rounded shape to finish all your ties. Cut away the excess fabric.

To make the neck ties follow the same steps with the 2" x WOF length of fabric but this time curve both narrow ends, enclosing them - then cut the tie into two equal lengths.
Now you have four ties.

TIP THREE:
At most hardware stores, or in your husband's shed, you can buy lengths of plastic piping and narrow ones are perfect for turning out long ties like these.
A nice long, thick knitting needle is also required, or perhaps a chopstick. I bought a set of lovely rounded end wooden knitting needles at an op shop about a decade ago for just this purpose.
The knitting needle or chopstick must be narrower than the plastic piping.

Drop the plastic pipe into the open end of the waist tie...

...right to the enclosed bottom.

Holding the pipe so that it stays at the enclosed end, gently push the end of the knitting needle into the enclosed end of the tie and push it right down inside the plastic pipe.

As you push the knitting needle down into the fabric, the tie will begin to ruffle until the needle emerges from the other end hidden inside the enclosed end of the tie...

At this stage you can remove the knitting needle as the plastic tubing is still inside the tie.
Gently pull the open end of the tie down until the complete waist tie is right side out.
Remove the piping.

Repeat the steps to make two waist ties and two neck ties.

Press the ties flat and sew a 1/4" seam along the curved side of them.

Finish the raw edge cut away side seams of the apron with a double 1/4 inch hem.
To attach the waist ties...
Unpick a small section of the side hem just below the cut away hemmed side seams.
Insert the open end of the waist tie.
Fold the tie up and over the hem before re-sewing the hem and sewing a second seam along the outside edge.

Follow the same steps with the neck ties...(noticed I'd forgotten to sew that seam along the neck tie so I did that later)...

...and to finish you want to topstitch across the top of the neck edge hem.

I simply added a doubled 1/2 inch hem along the bottom of my apron and it was complete.


I considered adding a pocket but as this apron will be my new favourite baking apron I won't need one.

And of course, I had to wear it straight away, right?!
(excuse my bathroom mirror...it's not bathroom cleaning day until Thursday)

I often get asked "Where do you find such pretty aprons" and though I do pick up many checks and stripes and plains at Spotlight or the supermarket every so often, my favourite place to shop for pretty ones is Bed, Bath & Table because at the end of each season they have sets of exceptional quality Morgan & Finch tea towels at very reduced prices. I often grab a set of three for $9 and use them for gifts or in my own kitchen. The friend who sent me the one used in this apron must also love Morgan & Finch!

NEED MORE CREATIVE IDEAS?
If you're after some other ideas to make while we're all staying at home here's a couple that may interest you.
Alicia Paulson has kindly offered her Maggie Rabbit pattern HERE for free at the moment. Blossom made one of her dolls for me at Christmas and assures me they are beautiful to make.

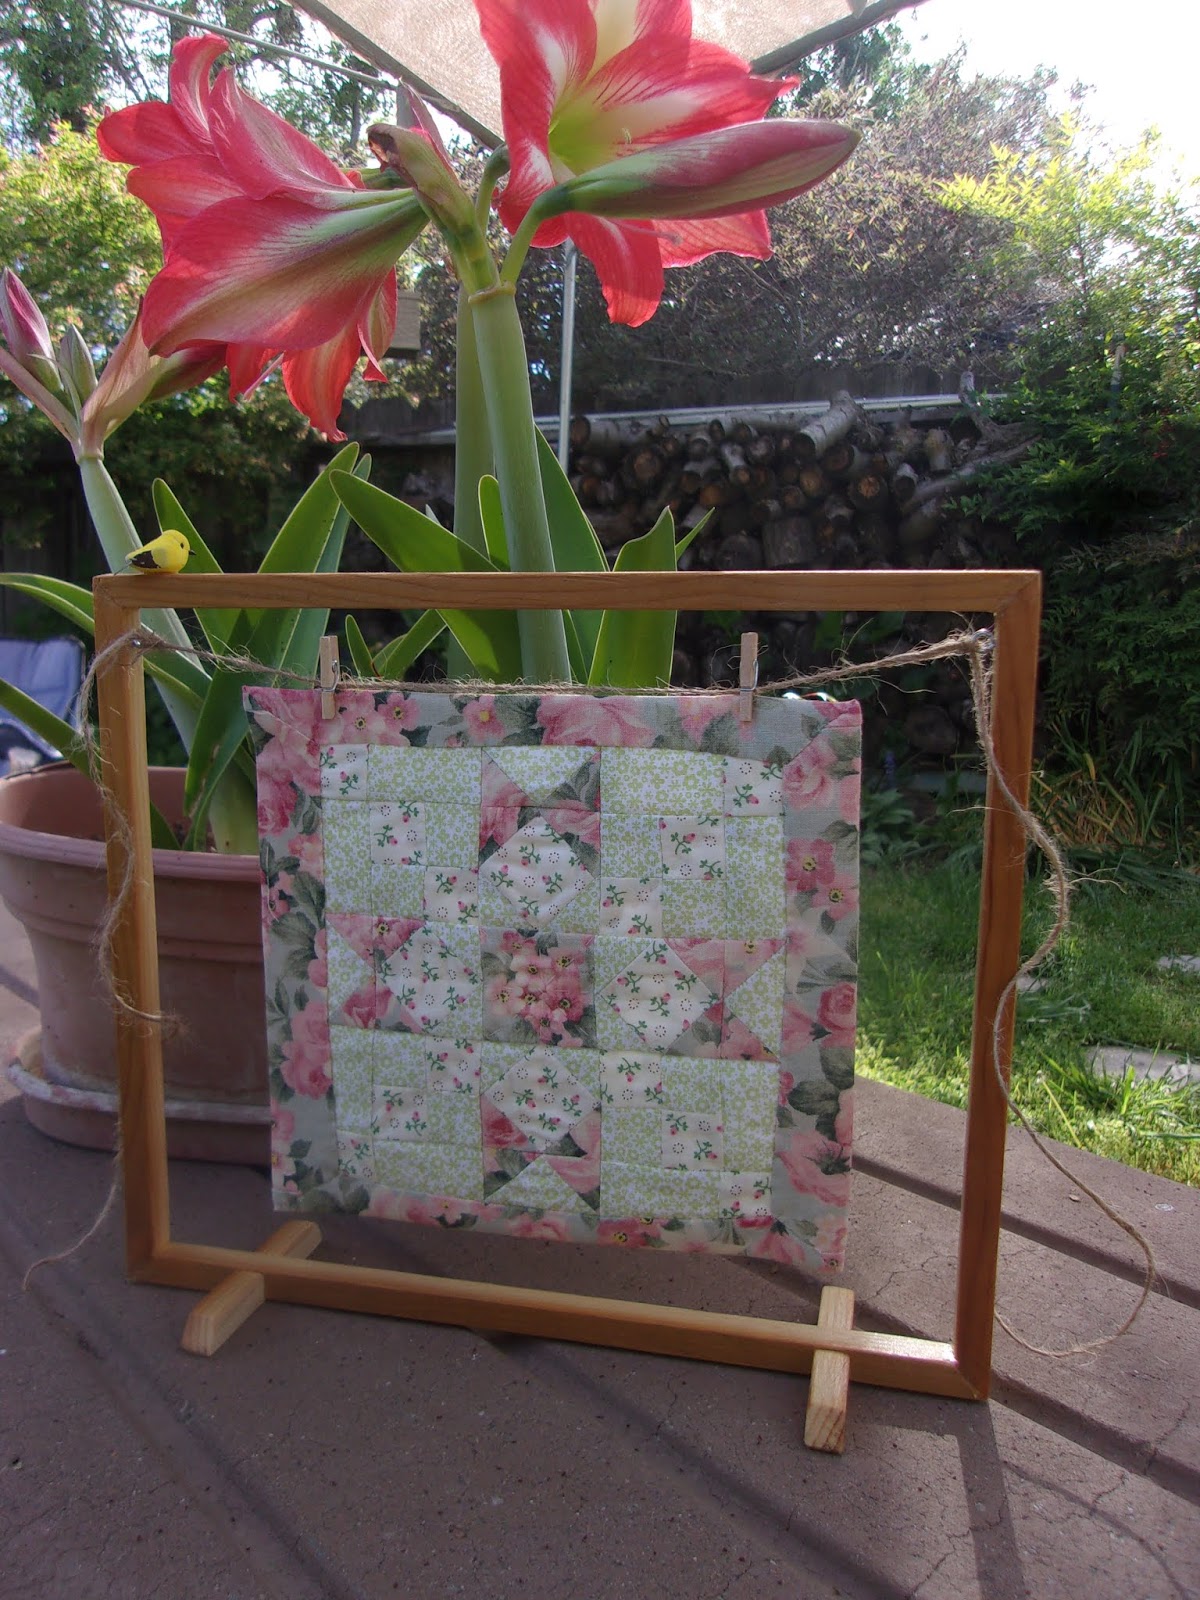
And this is my REJOICE stitchery pattern (available HERE) which has taken on the most beautiful display by Kathy who asked her husband to removed the glass from a photo frame and add a little hanging swag and standing feet.
She finished Rejoice as a mini quilt and the back is gorgeous too!
Isn't that a clever idea for displaying a small quilt or stitchery? Kathy found the idea on Pinterest - and unlike so many things I see there, she followed through and made it her own.
Thanks for sharing Kathy!

Well that was a long tutorial today so I won't share photos of what else is happening at home, even though I'd love to.
But because I'm missing those gentle homemaker posts which I usually share each week I'm going to postpone the final two Creative Hands At Home projects until next week on Tuesday and Thursday (May 5th and 7th) and do a homely catch-up post here on Friday. Can't wait to show you what my husband has made me with repurposed wood for the garden!
I wrote out this beautiful Psalm in my journal this morning and though it would be a wonderful blessing to share with you before I sign off today...
May
the Lord answer you in the day of trouble!
May the name of the God of Jacob protect you!
May he send you help from the sanctuary
and give you support from Zion!
May he remember all your offerings
and regard with favor your burnt sacrifices! Selah
May the name of the God of Jacob protect you!
May he send you help from the sanctuary
and give you support from Zion!
May he remember all your offerings
and regard with favor your burnt sacrifices! Selah
May
he grant you your heart's desire
and fulfill all your plans!
May we shout for joy over your salvation,
and in the name of our God set up our banners!
May the Lord fulfill all your petitions!
and fulfill all your plans!
May we shout for joy over your salvation,
and in the name of our God set up our banners!
May the Lord fulfill all your petitions!
Now I know
that the Lord saves his anointed;
he will answer him from his holy heaven
with the saving might of his right hand.
he will answer him from his holy heaven
with the saving might of his right hand.
Some trust
in chariots and some in horses,
but we trust in the name of the Lord our God.
but we trust in the name of the Lord our God.
Loving hugs

21 comments:
Very pretty I do love your ideas jenny.. I'm also intrigued with your cleaning schedule!! Do you clean rooms in particular days. I'm always exhausted with my routine
So pretty and nice and easy.
Yes, I do have a daily schedule...I find it makes life so much easier and I get to slow right down at the weekend.
I do certain chores on a specific day too. I too like to relax on the weekend. Has been working for me for 60 years.
Love this post.TY
Hi Jenny,
Thanks for the sewing tips and tricks! Gorgeous tea towel fabric! Great photo apron-ie !
Next week will be fine...I'm not leaving the house any time soon :) I'll be staying and playing at home :)
Looking forward to your gentle homemaker posts when ever they may be.
hugs,
Joanne
Thank you very much for sharing the ideas. Lovely photo of a lovely granny. God bless you.
Beautiful apron! I really like Bed Bath and Table too! I particularly like their Christmas decorations. I have a few Morgan and Finch brand manchester items - they have such beautiful patterns.
Hi Jenny Thankyou for another beautiful project and the rabbit looks very cute,hope you and your lovely family are well ,cheers Shez xx
Lovely apron! Almost too pretty to use. I think I'd be tempted to hang it on the wall and just enjoy looking at it, like a piece of art. We made tea towel aprons several years ago. My youngest was about ten, so the towel hit her at the knees. We flipped the bottom up to make it shorter which also gave the added benefit of pockets. She's 25 now, and much taller (5'7"), but still dons that apron for Christmas fudge making since it has a Santa appliqued on the front. I think your granddaughters NEED an apron too:-).
Thank you for this lovely apron! I read the upper comment about scheduling your work load. Could you share? There are times when I am overwhelmed to the point of really getting nothing done! How can I possibly sew?
I love full aprons and as I'm slightly shorter than 5'1"...lol....a tea towel would be perfect! Thank you...and thanks for the lovely Maggie rabbit pattern. Granddaughters will love it. Blessings...
Your apron is so simple but beautiful Jenny. I totally agree with you regarding tea towels not often being evenly hemmed - I find this lots when I sew a strip of fabric on the bottom of them to pretty them up. I am loving your posts & Kathy's mini quilt is just gorgeous.
This is a fabulous idea. Thank you also for sharing the psalm, it was just what I needed this morning. x
Such a pretty tea-towel apron Jenny, and thank you for sharing the link as to where to find the tea-towels. I was going to ask where to get them because they are so pretty and there is nothing like that here, but I am guessing a pretty pillow case would make a lovely apron too.
Kathy's little quilt looks lovely in that frame. Maggie rabbit is gorgeous, thank you for sharing her too.
A beautiful Psalm you have blessed us with today.
xTania
That was a fabulous homey post, Jenny! The apron is beautiful and easy. My gosh, I'd have been tying everything if I'd ever known your trick for turning skinny tubes! I've used every trick and still don't like doing it, but THIS trick will make it so easy. I just have to find that tube stuff. Thank you for that. Kathy's frame trick is also a great one. It's the kind of thing that always makes me wonder, "Why didn't I think of that?" Thanks to Kathy for letting your share her photos and the wonderful idea. Her finish of the bird is just beautiful.
Our stores here in TN are opening again starting tomorrow. Next week, I'm going to check out our Tuesday Morning shop and maybe also a shop called Bed, Bath and Beyond, which will hopefully be like your shop and have beautiful towels. Your selfie looks so cute! If I could ever take one that looked that good, I'd be snapping them way more often. Maybe I need the apron for that. =) Funny, I use the bathroom mirror, too!
Lovely tutorial. I have a collection of tea towels. It is my favorite keepsake to bring back from a vacation.
Love that tea towel. Much better as a pinny than drying dishes with it.
That Rejoice mini quilt is lovely it would make a really nice firescreen.
The bunny is so sweet too.
So many gorgeous ideas Jenny & not enough time!
You constantly amaze me how you can create such beautiful things . Very clever indeed.
Thank you, Jenny. Very pretty apron! I may have to make a few. I'm short, so when I do dishes my shirt gets all wet from being so close to the sink. Maybe I'll try some aprons.
Ooh gorgeous hon! Well done. And I do love the frame for that mini-quilt, clever idea!
I adore your newest apron made from a pretty tea towel. Reminds me of the ones my Grandma would sew. These would also make lovely hostess gifts...especially when we are out of isolation and can once again spend time with family or friends and enjoy a meal together. Blessings Dear...<3
Post a Comment