
After the big clean up and re-organising of my sewing room and office back in April I had many 'aha!' moments for future projects and tutorials. At the time I simply wrote them down in a journal for later reference while I pushed on to finish the two rooms.
Since then the ideas have been gradually moving forward from scribbled notes to real projects: matching colours of fabric and thread, planning how leftover sewing scraps can be transformed into something new, and pondering simple ways to finish forgotten UFOs...ideas that use what I already have on hand.
Last week I shared a simple tutorial for making a tall pillow using scrap binding, wadding, and pillow remnants as well as a three year old stitchery I'd completely forgotten about. If you missed it, refer back to THIS blog post.
Yesterday I dug out more binding leftovers, a few pretty button, plus fabric and wadding remnants, to prepare this new tutorial for you...

This sweet pincushion came together in one relaxed afternoon, after I'd auditioned a few combinations of binding and fabric for the set I liked best...

You will need:
Two, 5" x 8" pieces of fabric (I used almost the last bit of my favourite fabric from Brenda Riddle's delicious Durham Anew range)
18" length of aqua/pink spot and stripe binding (an older fabric line from Robyn Pandolph)
18" length of pink spot binding (no idea what this one is...?)
5 very small Mother of Pearl buttons
Two, 6" x 9" pieces of fusible wadding (I used scraps of Pellon)
Perle #12 cream thread for hand quilting
Filling for your pincushion...but more about that later
Let's begin:
Cut the binding strips into 6" lengths, for a total of six pieces.
With the right side facing, make a fold to find the centre of one piece of fabric, and lay the raw edge of one length of binding alongside the fold. Sew the binding to the fabric with a 1/4" seam...
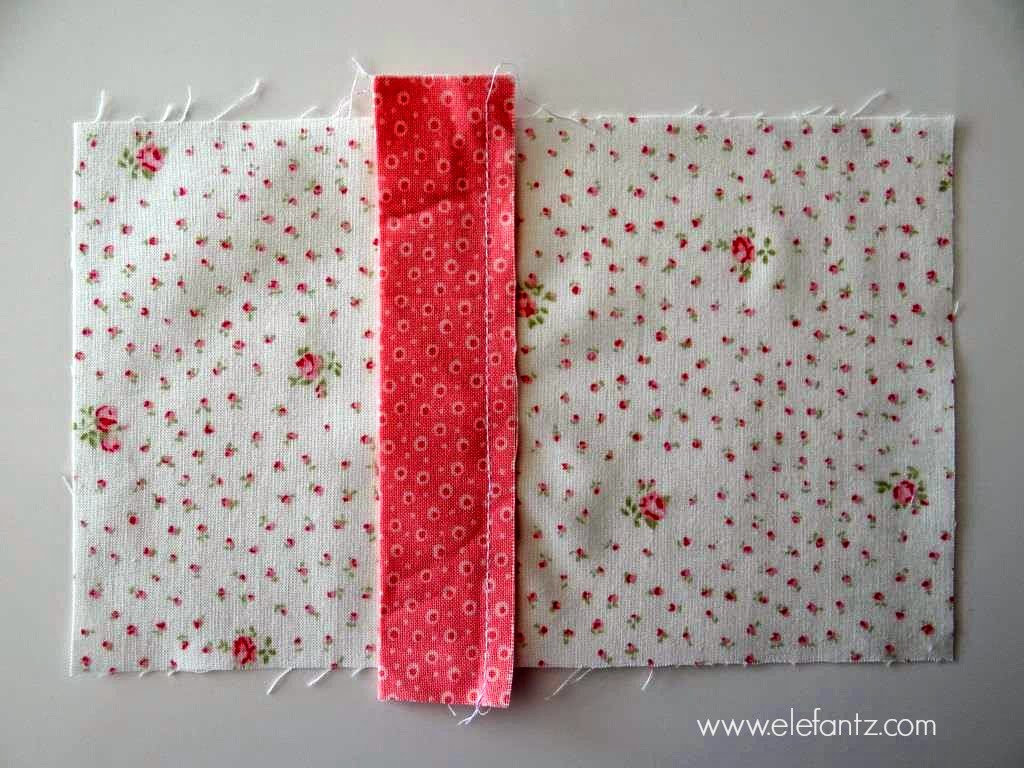
Sew a piece of the contrast binding opposite it.

Press one over the other, and pin...

Sew another binding length next to the folded edge of your previous piece...

Keep going until you've used the six binding pieces...

Trim the excess length from your binding strips and carefully fuse the fabric to a piece of Pellon...

Trim the excess Pellon from the sides.
Using a heat erasable pen, draw cross-hatch lines over the larger left hand side of the pincushion front, and checked lines over the narrower right hand side...

Quilt simple running stitch along the lines with your Perle #12 thread...

Sew the buttons in place...

Fuse Pellon behind the remaining 5" x 8" piece of fabric, draw cross hatch lines over it, and quilt as you did with the front of the pincushion...

Lay the front of the pincushion down onto the back of the pincushion, right sides together, and using a 1/4" seam machine sew around all four edges, leaving a 3" opening along one narrow end for turning out.
Turn the pincushion right side out, and press flat...

I recently bought a large bag of ground walnut shells from my local pet supply store to fill pincushions, but this was the first time I'd used it. It's brilliant! Use a funnel to fill quickly and easily...

Ladderstitch the opening closed and you have the cutest pincushion - made entirely from what you already had in your craft room...


A matching needlebook would be sweet too, if you have enough of the same fabric and binding.
Next week I'll share another tutorial for leftover binding, but in the meantime if you have an idea for re-using lengths of quilt binding leave a comment below - I'd/we'd love to hear it!
In case you missed my "Moment To Shine" blog post last year HERE it is, and below is a button you can wear proudly on your blog if you're joining in the move to 'work through your stash'...

Let's see how many wonderful things we can make this year from what we already have. Imagine the joy of no Christmas debt because presents were handmade for $0 - simply by shopping in your own sewing stash...does that excite you? It does me.
hugs

20 comments:
Oh Jenny, this is PERFECT for my rudimentary sewing skills!! I will be doing this one the weekend :) Thank you!!
Another practical tutorial for all of us who hoard lots of little bits and pieces in our stash.
Very clever, and very cute!!
Jenny, Love the pincushion. I can see it made a little bigger as a small pillow for a chair.
Patricia C
What a cute project. Always love to see what you come up with. Thanks Helen.
Great pincushion! I love the way you sewed the stripes.
Wow, that looks great!
Hugs
Lida
Wow, that looks great!
Hugs
Lida
Hi Jenny, love your little pincushion. I use leftover pieces of binding to trim bibs and to make piping for other projects. Thanks for sharing your cute idea.
Blessings, Capi
Love the pin cushion, such a great idea using up scraps. Must try the walnut shells in my next project.
Oh, Jenny - another innovative, creative project. Thank you - once again - for sharing.
xxx
That is so pretty. My mind is already rummaging though the batik scrap bag I found the other day. I think this would be pretty in any fabrics.
such a lovely project Jenny,thanks for sharing.xx
Jenny,
Thank you, again, for sharing. I have a question: do the ground shells dull your pins and needles? I've never used them.
Thank you.
Your pin cushion is so pretty, Jenny. Thanks for the tutorial.
Lovely
Great uses for your UFO's Jenn xx
Such creative energies! This is a genius design. Cute, simple, and truly 'scrappy', yet coordinated. Love it! It will make nice gifties for quilty friends.
I am sooo jealous..I've been to I don't know how many pet supplies places here in SA and even tried Bird places and reptile places....and I get virtually the same response in all of them when I ask about the crushed walnut shells Insert dumbed expression on their face "HUH?" I explain why I want it, and they tell me they've never heard of it, perhaps I should buy kilo's and kilo's of walnuts and crush the shells myself....yeah right, I procrastinate enough as it is, without spending hours crushing walnut shells lol
Thanks for the tute
Hugs
Naomi
http://www.amazingamazon.com.au/desert-blend-walnut-lizards.html
It’s not cheap, but that’s what I paid for it. However, it will probably make about 30 pincushions! :-)
Hugs
Jenny
Post a Comment