Showing posts with label Christmas ideas 2018. Show all posts

Friday, November 16, 2018

L is for lovin' these pincushions...


If you could see my sewing room table right now you'd notice two things. 

1. It's messy but colourful.
2. There are many fabrics in piles of two or three prints waiting to become the next pincushion.


I'm thoroughly enjoying this process as I'm discovering many fabric combinations I'd not considered before and once they have been placed int their own little pile on my sewing table I'm quite hesitant to remove them because I love them all. 

This week 'love' is quite appropriately the letter L along with two lovely aqua toned prints which have partnered to give you our newest pincushion idea. 

Stitched onto a cream cotton/linen blend background I rotary cut the completed block on a 45 degree angle before sewing a 1½” wide piece of  aqua floral (from Tilda's Lemon Tree range) top and bottom. Then I added a 3" wide piece of aqua/green floral (from Tilda's Circus range) top and bottom again before cutting the top and bottom straight to give the front of the pincushion an angled appearance. 


Because that Lemon Tree print really has impact with it's beautifully deep aqua background I decided to add a little loop to the side.

Now, the L must be for Ladybug, right?


Embroidered with a mix of chain stitch, backstitch, satin stitch, lazy daisy and french knots (plus a wee pink cross stitch) this tiny L shows you can add a lot of variety within a very small design.

Download the L pattern here or here

This pattern is free until December 6th, along with the J and K patterns. Scroll my blog for those links if you missed the last two pincushions.

The patterns for A-E and F-I are available to purchase here in my shop for $2 a set.


There's a countdown to Christmas happening and when I was at sewing group this week I saw some beautiful handmade decorations. This reminded me I've not made a decoration for this year so had best get to it very soon.

In year's past I've designed some lovely ones which remind me of that year and the joys of our special day as a family with many or few around the table. If you'd like to make your own versions of my ornaments the patterns are temporarily HERE in my shop at the moment as instant downloads...


I hope your weekend is lovely, filled with all good things, people who care about you, something to sew and delicious comfort food that quite simply makes your heart smile.

Bless you heaps,

Follow my blog and never miss a post here at Bloglovin!

Saturday, November 3, 2018

Pincushion Stitch-a-long - the next pinnie...


Can you guess that I've been waiting to stitch my own J pinnie since we began this stitch-a-long?
A piece of extra special fabric had been set aside, a beautiful gingham style floral fabric from the 2015 Flower Sugar range by Lecien which I hoped to embroider directly onto. 
Cherishing the small piece still in my scrap box I wanted to feature it in a project I'd see every day and a pincushion is exactly that.

Now let me show you around my pretty J pinnie. 


If you have the same fabric, wonderful, but if not you'll need to choose a print that features a floral motif but has enough space between the motifs to stitch an initial.

As with all my previous alphabet pincushions I trace the design onto my background fabric first (and sew borders around it if that's the pattern I've chosen) before fusing a thin wadding behind the front of the pinnie. For this series of pincushions I've chosen to use Parlan as my wadding but you could use scraps of cotton or wool quilt wadding, or even thin Pellon. 
Next I stitch the initial.

The J design sits in the space to the left of a floral motif and instead of adding a colonial knot inside the flower petals I've sewn a small glass bead instead. For that added touch of sweetness a trio of the same glass beads was then sewn into the centre of the floral motif's main flower.

Sew two pieces of fabric together for the back of the pinnie, but leave an opening. Machine sew a line just beside the seam for added security. Lay the front of the pincushion onto the back, wrong sides together just as though  you were sandwiching a quilt. Sew the front to the back around all four sides with a scant eighth inch seam.


Now just as though you were adding binding to a quilt, sew 1" wide cotton lace around the front edges of the pincushion, mitering the corners as you go.


Fold the lace over to the back and slip stitch in place.


Fill the pincushion through the back opening and whip stitch it closed with small stitches close together. 


Do you think there's a suitable print in your fabric stash for this pincushion?
If not you may need to take a trip to the fabric store...LOL!
Any excuse, eh?

Download the free J pattern here or here until December 6th.

The October patterns for F, G, H and I are now here in my shop as a $2 purchase for the set, along with the September A - E set.

Consider using lace for binding on any project, though the bigger the project, such as a quilt or mini quilt will require lace a bit wider but no more than 1 1/2" as you can get a nice firm binding with that size.

Here's a redwork mini quilt pattern of mine which has cotton lace binding. It really adds that something extra to the finish of "Summer Mellow".


This pattern is here in my shop along with Winter's Fellow...


...or get them both as a gift over here.


Now, on a whole 'nother topic I thought  you may like some Christmas ideas?
Two blogging designer friends have projects that will get your heart racing, one is simple, the other two may require a bit of time and concentration.

Xanthe from WifeMade created a gorgeous free wreath pattern which you'll find in this blog post.
This project is foundation paper pieced, something I've never attempted, but the end result makes me want to try.


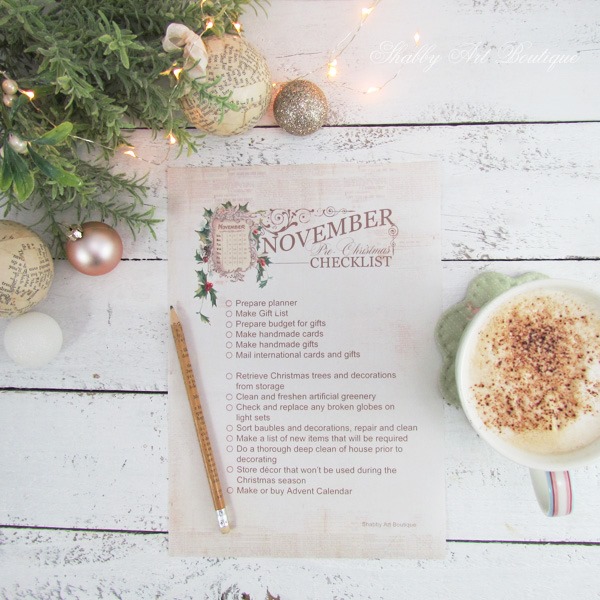
Kerryanne of Shabby Art Boutique shares Christmas printouts every year and this week she began with a November checklist.
You'll find it in this blog post...


Now something else Kerryanne has started is a Club for papercrafts and fabric printables and the first month expires soon, but just in case this hobby is your thing you may like to head over here and see the gorgeous planner pages and extras she has for her members.

( I receive nothing for sharing these links...I just LOVE what Kerryanne does and wanted you to see her planner!)


Okay, enough from me today.

I have just a weekend to bake, sew, garden and generally get up to date so that when my blessed daughter Anita and 4yo granddaughter Aminah arrive on Monday my attention can be wholly and solely on our four days together with sweet Blossom, Cully May and Rafaella. I'm so excited!
Photos will indeed be shared.

In the meantime, may the Lord God fill your beautiful heart to overflowing with happiness, hope, contentment, courage, kindness and love.

If you want to keep in touch between blog posts simply head over here to my Instagram page, or here to my Facebook page.

hugs