Showing posts with label elefantz patterns. Show all posts

Tuesday, November 24, 2020

TUTORIAL - easy tie top pillow...


If you're like me (someone who loves to embroider and has a huge pile of completed stitcheries packed away in a large plastic tub in their sewing room) then you're probably often on the lookout for simple project ideas which could delightfully feature a few of those orphan hand embroidered pieces, right?

This past year I've made three tie-top pillows from some large stitchery blocks and every time I've been incredibly happy with the final display!

As many of us are now in gift-giving mode and perhaps don't have too many pennies spare to go shopping this Christmas season, I thought it would be a good idea to share a simple tutorial for making  your own tie top pillow from one, two, three or a dozen orphan stitcheries. Now, I only use fabrics which are already in my sewing room and I encourage you to do the same because apart from purchasing a basic cushion insert for a few dollars the rest of the pillow project won't cost you a cent - though it will require half an hour of your time. 

The stitchery I've used for my latest pillow is one of three in December's "Faith In Hand" set (over here) but you could use any stitchery you like - in fact if you're more of a patchworker or English paper-piecing gal either of those would work just as well.

 I'll share the measurements for my pillow, but you'll soon see that it's easy to use any measurements depending on the size of your pillow front.

For this pillow I trimmed the stitchery to 8.5" wide x 9.5" high and bordered the block with 2.25"wide lengths of leafy fabric. This gave me a pillow front of 12" x 13" which I then fused Pellon behind and machine quilted in straight lines (you could use quilt wadding, but I had odd shaped pieces of Pellon in my scrap wadding box and chose to make use of one)...


Cut a piece of backing fabric the same size as the pillow front (my front is 12" x 13" so my pillow back is 12" x 13" as well) and two pieces of contrast fabric 2.5" x 12" (the width of the pillow front) to sew across the top of front and back later...


You'll also need four pieces of fabric 2.5" x 12" for the ties.


We need to make the ties before we go any further. 

Fold each of the four ties in half along their length. Sew across one narrow end with a curve and continue down the side with a 1/4 inch seam  - leave the remaining narrow end open.

Trim away the excess on the curved end.


Turn the tie right side out and press flat.

Here's each stage...


Pin the raw end of each tie to the top edge of the pillow front and back. Mine were spaced 3.5" apart.

Lay the contrast pieces you cut earlier over the ties so that the ties are sandwiched between the pillow front/back and the contrast fabric. Sew across the top with a 1/4 inch seam and press the contrast fabric away from the pillow front/back.


Lay the front and back of the pillow right sides together and sew around the sides and bottom with a 1/4 inch seam.


Fold a double 1/4 inch hem along the raw edge of the contrast facing fabric and sew in place.


Turn your pillow right side out, pushing the contrast facing inside and pressing the ties away from the pillow.


Now all you need do is pop in an inexpensive cushion insert (I buy mine at Spotlight), tie the top, and you have a really cute tie-top pillow to keep or gift.

I usually tie bows across the top of these pillows but for this one I liked the dangling ties. Do what you love!


Here's one of my other tie-top pillows which sat on our bed through autumn and winter. I added three green/white spot ties because they contrasted beautifully with the rich red...


The pattern for the "Potted Sampler"stitchery used in this pillow is over HERE in my shop. I actually made that design twice because I wanted to show it in two different colourways (both are included in the pattern).

The deeper reds work well with our autumn/winter bedspread...


But the softer colours are very shabby chic and perfect for our spring/summer bed coverings.
Of course this means I'm late making a new pillow because I haven't even begun this one. 
Adding it to my to-do list right now...


Just out of curiosity, which colour palette do you prefer for this design?

Well, I'd best be off and get dinner for my darling man as this tutorial was written up later in the day than I'd planned, but for a jolly good reason...I spent a few wonderful hours with Blossom and the girls this morning and rather than having her usual nap when the girls do, Bloss asked me to stay an extra hour just so we could chat without interruptions. What a blessed day I had. 

She's still hanging on and though there are signs the baby is not far off making his appearance we all know that the more babies you have the more you 'feel' things sooner rather than later. If he hasn't arrived in a week Blossom will be induced so would you pray her little lad makes an appearance before then please? (thank you xx)

Shall you be making one or more of these pillows??

I have some wonderful garden pics to share with you next time...

Loving hugs


Tuesday, February 20, 2018

Bringing it all together...

Now that I've sorted through almost two months of detailed notes for creating a new household planner and refined and divided them all into appropriate categories which should work for our home, I purchased a large arch lever binder and dividers to gather everything in one place.
Rather exciting!

I also chose a new name for my household planner, The Gentle Homemaker's Companion, because it's going to sit on my desk and hold all the bits and pieces of information I need to run this home - the too-numerous-to-count things that my mind simply cannot remember all by itself, even after a triple-shot Doppio coffee. 

But of course, in my home not many things are left without some form of decoration, some dab of prettiness, even amidst their functionality. So my binder needed a cover.

I spent a night and a morning going through my very large box of completed stitcheries, finally selecting three contenders who would be worthy of display on the cover of my Gentle Homemaker's Companion. Another day passed before a decision was made, and it was based on what I felt best described my view of home life...


I even found a half yard of fabric in my stash which blended beautifully with the stitchery threads and applique. The tiny cross stitches in the fabric just ooze 'home'.


The embroidery design is from a year or two ago (the pattern is still in my shop)  and after originally thinking it would be lovely framed I'd changed my mind and packed it away until a better use came to mind, and I'm so glad I did.

After making a basic cover for the binder the embroidery block was blanket stitched to the front and bits of lace sewn in place with a couple of vintage buttons from my collection.


Fortunately the dividers I purchased before making the cover also complement the fabric and stitchery colours.
Peach, mint, golden brown and aqua. 


I'm so happy with the end result!
Now all I need to do is transfer my household planning information into the appropriate sections of the Gentle Homemaker's Companion.


This really will simplify things for me.
And simple things help to make a house a home...


If you're wondering what categories I'll be including inside the binder here's a few -

* Shopping Lists, Pantry Stock & Menu Plans
(includes a rotating fortnight of tried and true recipes plus a few new recipes I'd like to try, plus preserving and sour dough information)

* Gifts to Make or Purchase
(includes a yearly calendar with all birthday or special occasions which require a gift, card making ideas, and any other information which may prove useful in making or purchasing gifts for a particular recipient)

* Cleaning Master Sheets and Homemade Cleaning Products
(includes detailed room-by-room lists for seasonal deep cleaning, plus recipes to make my own cleaners and household products)

* Patterns for Household Items
(includes knitting or crochet patterns for dishcloths, sewing patterns for aprons, peg bags, door stoppers, fabric storage boxes and other items for the home in general)

* Pets
(includes all pet health information)

* Health
(includes all current health details, health provider contacts, current prescriptions, natural remedies and helpful information for alternative treatments)

* Garden
(includes files on what we are growing now, what we want to grow suitable to our climate, and how to care for what we plant and grow)

* Warranties/Receipts/Insurance information

* Emergency Numbers and Contacts


I also have a large recipe binder which I use to hold all our family's favourite recipes, as well as new recipes to try in the future. 


(the stitchery on the cover is also in my shop)


It's from this binder that I will choose a smaller selection each fortnight to put in the Menu Planning section of the Gentle Homemaker's Companion. 

I'm gradually sifting through all the recipes gathered over the years and which had been saved onto my computer in order to print them up for this folder. I tend to wait until my ink cartridges are almost empty and then print as many recipes sheets as possible to use up every last drop of ink - that's why this project has been taking time. However, a blessing the other day was discovering my local supermarket was getting rid of all their printer cartridges and there were two for my printer at 75% off the full price. I was grinning from ear to ear as I handed over the money and popped them in my bag! 
Now I can set to work and print all I need to fill my recipe binder.

I know this sort of planning isn't everyone's cup of tea, but for me it's peace of mind, a road to follow which turns chaos into calm and allows me breathing space in what can often be a busy life of juggling home, family and business.

If I'd not followed this example when I was a homeschool mum I doubt my sanity would have survived, but that lovely cadence of order and rhythm was a blessing beyond words so I know it works for me.


My new routine of stitching one of Allie's "A Garden of Contentment" blocks each Sunday continues.
The words give me much to pray over, to ponder how I live them out through my own day to day life.

This week's block was "Mercy" and here's my version of Allie's design...


When I was in Bible College one of my lecturers had a wife who told me she'd chosen not to walk in mercy, that she had no desire for it, and I was shocked.

To follow Jesus is to be transformed by the renewing of your mind, to have your old nature replaced by His, and as mercy is a big part of Jesus' nature I prayed to not be like her, but to have a merciful heart and grow always in mercy.

As I stitched Allie's 'Mercy' block on Sunday that prayer was offered once more because mercy is something I need to always be growing in, always offering. And I pray the Lord's mercy will forever be upon my life for His mercies are new every day, and I need them every day.


The other week Fee drew my attention to a series she's been watching and thought I'd enjoy it too.
Enjoy it?
Oh my, I am loving it. The sense of community in times of trial, the respect given one to another, modesty, kindness, the dresses, the quilts, making do with what you have, trusting God...things I personally treasure but see less and less of in this 21st century world. 

I enjoyed season 1 so much that I purchased the audio book and each afternoon as I do a bit of hand sewing or stand in the kitchen preparing meals for my husband, I listen to a chapter.

"When Calls My Heart"...


I think I'll add another category to my Gentle Homemaker's Companion.

* Books I'd like to read, movies I'd like to watch, places I'd like to go and other things which may add inspiration to my life.

Do you have good reading suggestions?
I'm not much of a fiction reader, but I am about to re-read Little House on the Prairie because you'd be amazed at how much homemaking lies within those pages, and it's those sorts of books I tend to enjoy.


Blossom is almost 39 weeks pregnant and had a false alarm labour the other day, but with a birth imminent she would appreciate your prayers for a calm, gentle and safe delivery.
(( thank you))


God bless you dear ones. May this week offer many sources of inspiration for your very own life so that your cup runneth over with all manner of goodness...

hugs


Saturday, September 7, 2013

Mini quilt, linen and Beauty...

It's Saturday. National election day. I'm off to vote.

But before I do, I forgot to mention yesterday that I've listed the final block of Shabby Roses Beauty in my shop - it includes the full quilt assembly instructions as well.
There are quite a lot of ladies making this BOM and it's not too late if you'd like to start now. I'll leave the five individual block patterns in the shop until January 1st, 2014.


 Also available as a single pattern download is the first mini-quilt from my "Seasons in Redwork" series, 'Spring Calling'...


And don't forget, Daisy Days block 4 "thursdaisy" is also in the shop as an instant pdf download. It's not too late to begin this 8 month BOM, either.


Visit the Elefantz Shop HERE for instant pdf pattern downloads!

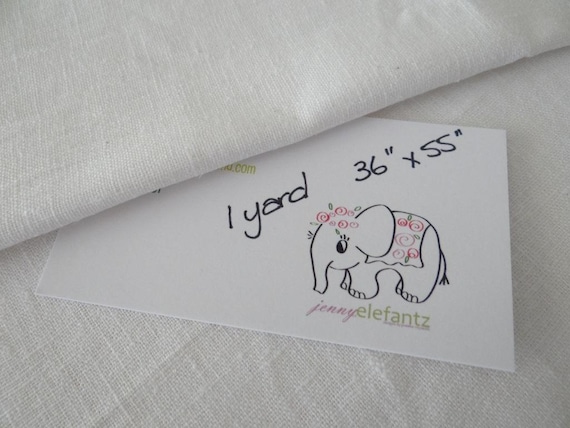
I also have a few one yard cuts of hanky linen in my Etsy Shop. They are all that's left from this bolt - the linen sells out faster than I can cut it!
Purchase hanky linen HERE.


Don't forget the week of celebratory *Bouquets* begins on Monday!
...with a giveaway too!

hugs
jenny