
Good morning! Today we begin a four-part stitch-along which I'll be sharing with you throughout March.
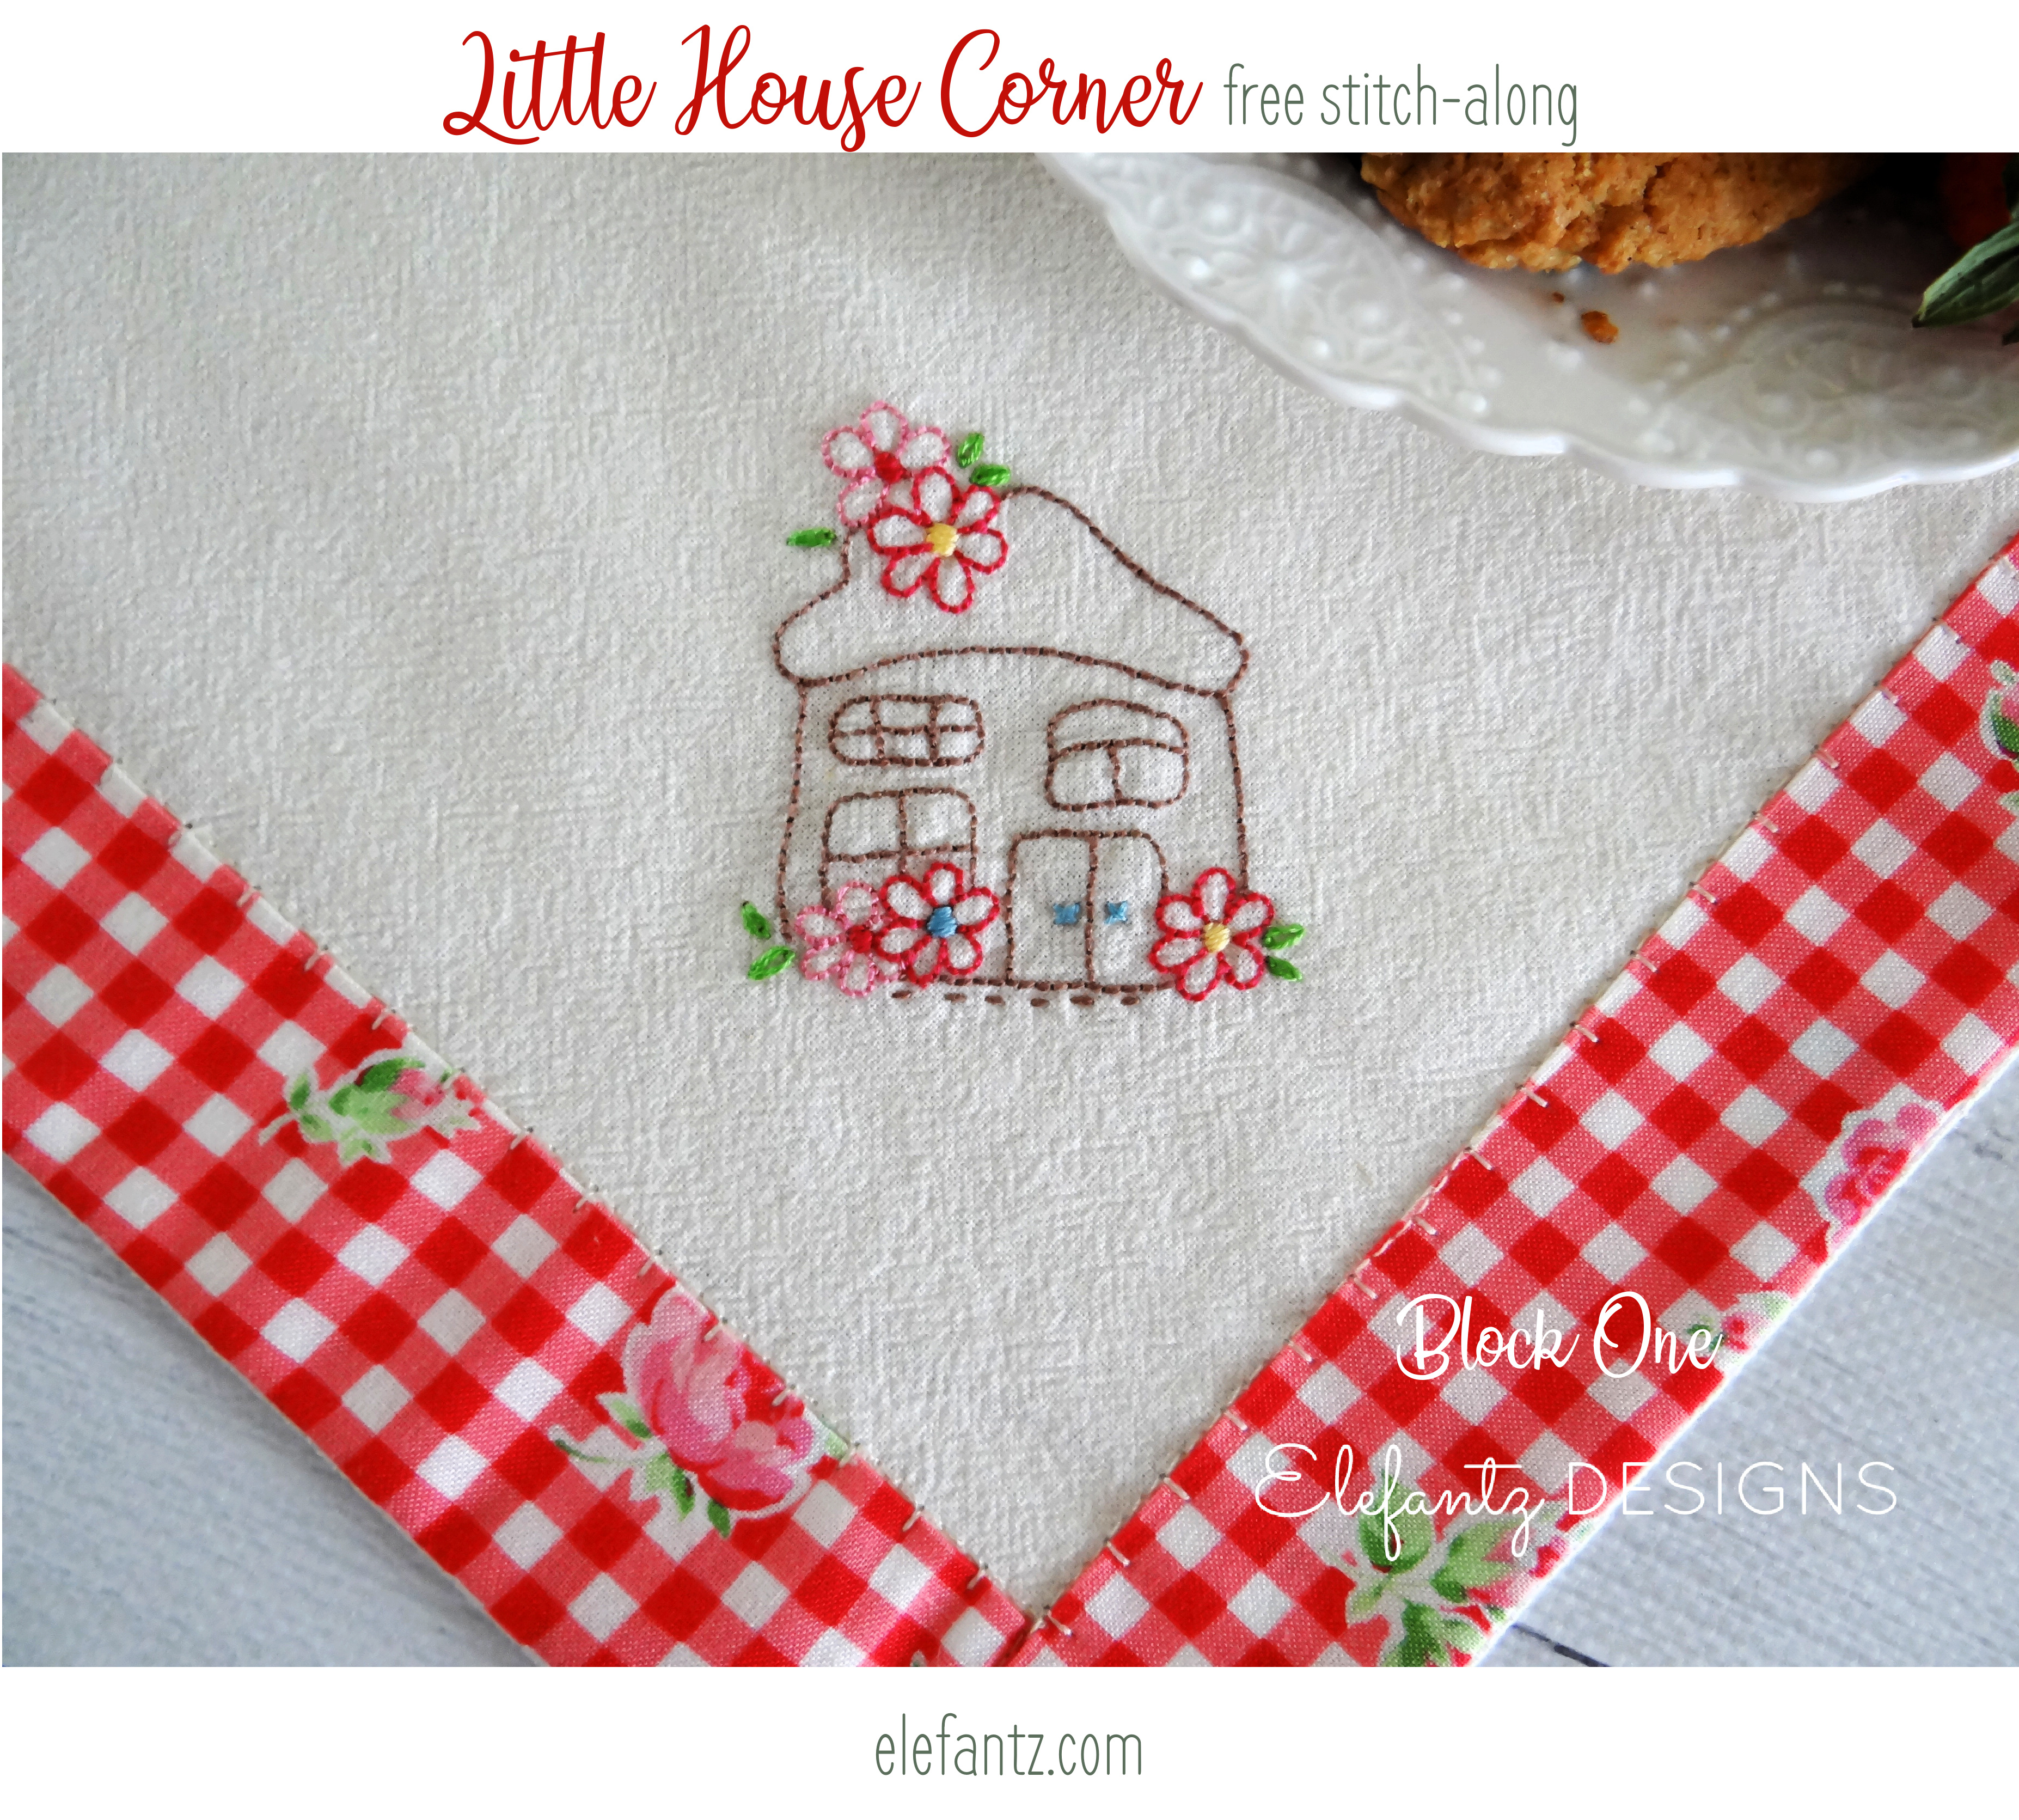
I named it Little House Corner because we shall be stitching four cute little houses into the four corners of a simply bordered cloth. Your cloth can be made of any solid or tonal fabric you like, however, I have stitched three of these small supper cloths (table cloths) using authentic unbleached flour sack. A lovely floral gingham print border adds a simple sense of homeliness to the completed project. If you missed last week's tutorial for creating a bordered cloth, you will find it HERE
Today, before we start embroidering our first little house, we need to position the design in the corner of our bordered cloth. I did a tutorial for this back in 2017 when I made my first supper cloth, which had a summery yellow border and the same little vase of tulips in every corner.
The tutorial instructions from 2017 for correctly positioning a stitchery in each bordered corner is the same as you will use for all four houses in our 4-part stitch-along, except that you will be stitching four different houses instead of one repeated design.
1. Print the design you wish to embroider and gather a pencil and quilters ruler. Because my tablecloth is a square the corners are a perfect 90 degree right-angle, as you can see below.

2. Decide how far into the corner you want your embroidery and after positioning the ruler over the design use a pencil to trace the corner under the design.


3. Place your fabric over the pattern sheet and line up the corner pencil lines with the corner of your fabric before tracing the design. I did not trace the cloth under the vase, as you can see.


So let's make a start on our Little House Corner supper cloth today, shall we?!
This week we're stitching house number one, so print up your pattern sheet and follow the instructions above for tracing the first house into one corner of your bordered cloth.
The embroidery instructions are on your pattern sheet.
Use the link below to download the first little house pattern.

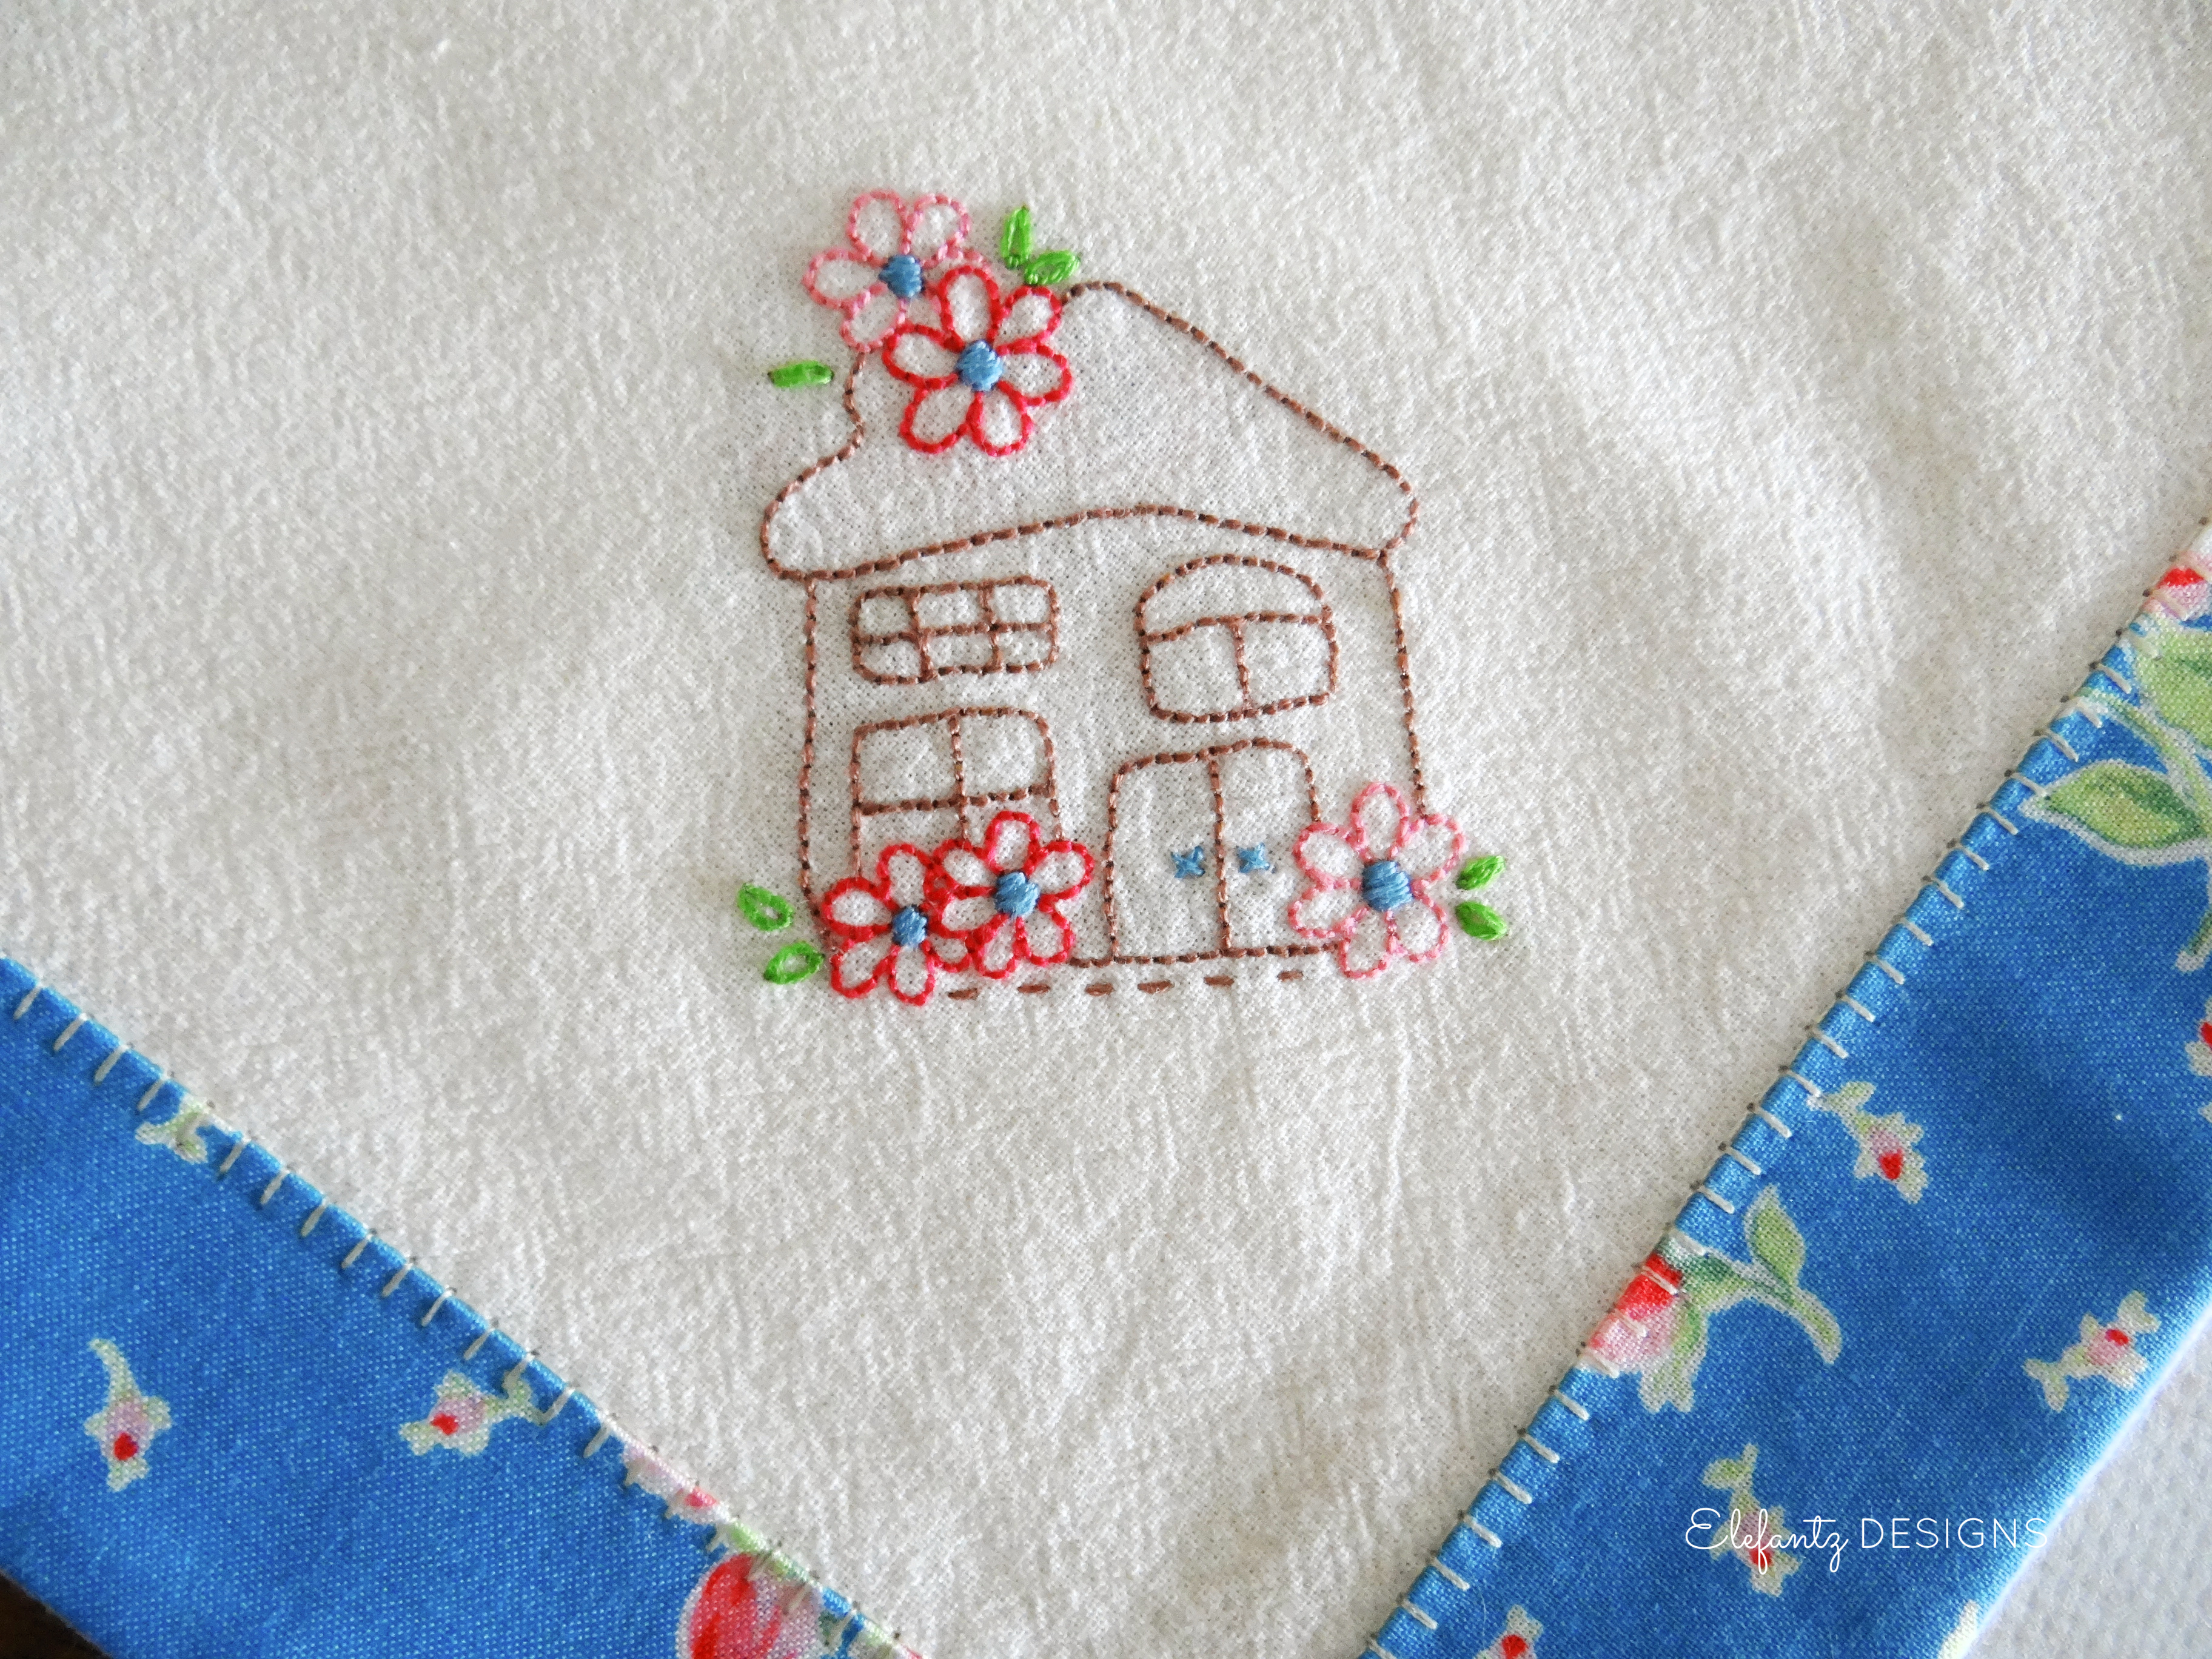
I have previously stitched two Little House Corner cloths, one for myself and another for my friend Rosie. Mine has a red floral gingham border and hers has a blue floral border, which blends well with Rosie's calming blue and white home decor.
I was at Rosie's yesterday and wanted to show you how she uses her supper cloth. We always have a lovely morning tea before we stitch and chat about recipes, the garden, homemaking and family, and I absolutely love how she placed a red gingham tablecloth on the table first, then the supper cloth diagonally over the top! I instantly thought of a farmhouse kitchen and couldn't help but smile with delight.

Here's the same little house you'll be stitching this week, but bordered in blue...
Choose thread colours which blend nicely with your border fabric. I did not fuse any stabiliser behind the stitchery corners as flour sack is quite a sturdy fabric and it was not necessary. It's entirely up to you whether you want to add a stabiliser, but I think if you don't carry threads across the back of the design, but secure them when each coloured section is complete, you will be fine without it.
Here's the back of my little house so you can see what I mean...

And here's the back of my tulip supper cloth as well. This cloth is almost six years old now and has been washed many, many times. I hang our washing out on the line in the bright tropical sunshine, and it has worn very well. I've never had to repair the border or any of the hand stitching...

I'd love to see your cloths coming to life, so if you have a blog please leave a comment with a link to it so I can come take a peek. If you're on Instagram use the hashtag #littlehousecorner so I can find you, or drop by my account @jennyofelefantz to say hi and let me know.
MORE news!
It's been a while since I added a brand new pattern to my Etsy Shop, but as you probably know, I've become a bit of a redwork lover the past couple of years, and combined with my love of home, this new design kind of made my heart sing.


"Always Be Home-Hearted" is a PDF download from my shop, so you could fill time stitching it in between the weekly Little House patterns this month.
The design is mostly backstitch, with some satin stitch, French knots, running stitch, lazy daisy and cross stitches scattered throughout.

The mini-quilt measures 12" x 13.75" and was stitched onto a white cotton/linen blend background. Borders of assorted red fabric scraps complete the project.
Imagine it in blue or green...mmmm. Nice.
You'll find the pattern HERE
I hope you enjoy stitching the Little House Corner, my new redwork pattern, or something else from your sewing basket over the weekend. I believe when we have a heart for home, that love grows the more we tend and nurture it. For me, there's real delight in adding handmade pieces to our home - just as I gain joy from baking a loaf of bread, filling jars with hot jam to fill the pantry, or folding sheets fresh off the clothesline. When our hearts are turned towards home, when we actively choose to participate in creating a safe and inviting sanctuary within our walls, when we slow down and appreciate what is right before us...we are not just blessed, but become those who give a blessing to others.
God bless you,

Don't miss out on any Elefantz news or free patterns.

7 comments:
Lovely, Jennifer. Edi and I were just talking about this today, how we both want to make one. Thank you so much for designing this, and sharing it with us. I loved seeing Rosie's table with the cloth on it.
Hi Jennifer,
We have the same Sew Easy 6 1/2 inch ruler ! I found mine at Hobby Time in Zeewolde :)
Thanks for another great tutorial with lots of photos !
The bordered in blue so matches those cups and saucers :) Must have been a yummy visit :)
Gteat to see new things arriving in your shop :)
hugs, take care,
Joanne
I am so excited to begin stitching! I just finished the border cloth yesterday, and, as with all of your patterns, your directions were easy to follow. I don't think this is a project I'll just make one. I see another for myself, and one more for a gift! Thank you for all of your hard work and creativity that you share with us.
Thank you!+Adorable♥️💝🎁
Your redwork is so sweet. I used to do a lot of " blue" work. Your little house is cute.
Hello Jennifer. Your little house is very cute. I love your Always Be Home-Hearted mini quilt. Hugs, Christine xx
Me encantan tus diseños, son muy apetitosos
Besos
Post a Comment